Do you want to install an epoxy cast floor yourself? Read our manual
Do you want to install an epoxy cast floor yourself? With the help of this manual, we will explain to you in detail how to apply an epoxy cast floor yourself! One of the advantages is that an epoxy cast floor can withstand a high mechanical load with a layer thickness of 2 to 3 mm, which gives it a long lifespan. After curing, the epoxy cast floor provides a sleek and high-gloss surface, and a matt gloss PU coating can be applied over this if desired.
In this manual we take you step by step from preparation to finishing. If you have any questions or doubts in the meantime, please feel free to contact our specialists!
Step-by-step plan for installing an epoxy cast floor yourself
Step 1. Provide the right surface
Supplies:
- Floor sander.
- Sanding sheets.
- Vacuum cleaner.
- Ammonia diluted with water.
Before the epoxy cast floor can be applied, it is important that the surface is in order. The surface must be free of dust and dirt. For a concrete surface, our advice is to first sand it with grit P24, this way you remove the top layer of the concrete and ensure a clean, flat surface.
We recommend renting a floor sander so that your floor will be a success!
Are there holes or cracks in your concrete floor? Then read our information article about Repairing holes and cracks in cement and concrete floors.
Step 2. Apply primer
Primer ensures good adhesion between the floor and the epoxy cast floor. Applying primer is therefore an important step that you cannot skip.
Supplies:
Take a look at our ready-made
auxiliary material packages for the epoxy cast floor in both large and small. This contains all the auxiliary materials needed for processing the primer and epoxy cast floor.
We have written four information pages about priming various surfaces:
Cover all parts that should not be covered by a primer or cast floor with masking tape.
Is the floor not completely smooth yet? For the smoothest result, apply an epoxy schraping layer after the primer has hardened. This layer removes small irregularities from the floor, creating a tight base on which to apply the epoxy cast floor.
Step 3. Mix epoxy cast floor
Mixing the components correctly is one of the most important factors for an even and well-cured epoxy cast floor, so don't waste your time on this.
Supplies:
Always check before use whether you have received the correct color. Do you have any doubts about that? Please contact our customer service.
Mix the pigment paste in the cast floor can (A) and add the hardener (B). Mix this well for at least 5 minutes with a spiral mixer on a drill until it is a homogeneous mass. Also mix well around the edges and bottom of the tin.
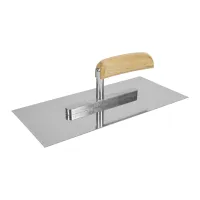
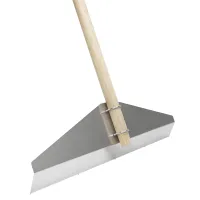
Pour the epoxy cast floor as quickly as possible after mixing. Once this has been poured, you will have the longest processing time. If the epoxy is left in the can for too long, it can become too hot, making it impossible to process. After the mixture has been poured, spread the epoxy along the edges with a smoothing trowel and the rest with the squeegee for cast floors. This way you maintain a thickness of approximately 3 mm.
When the can is empty, do not place the can upside down on the floor to drain or scrape it out. There are often parts at the bottom and along the edges that are not mixed properly, which can cause soft spots in the floor.
Tip: are you processing several 25 kg cans of epoxy cast floor? Then choose a heavy duty mixer instead of a spiral mixer, which is a lot more powerful.
Step 4. Apply non-skid (optional)
Do you want an epoxy cast floor with anti-slip properties? Then apply anti-slip granules to the still wet cast floor. The granules provide a reasonably coarse anti-skid effect. Spread them as evenly as possible by throwing it diagonally upwards into the air. Sprinkle the entire floor in this way. To do this, wear spiked shoes so that you can walk on the wet cast floor.
Step 5. Curing and follow-up
Once the cast floor has been spread, let it harden for at least 48 hours before the floor can be walked on. Make sure that the temperature in the room remains approximately the same during curing. After 72 hours the floor can again bear a heavy load and after at least 7 days it can be chemically resistant and moisture resistant.
Our advice is to finish the floor with a matte floor coating. This coating gives your epoxy cast floor a scratch-resistant protective layer with a light non-slip and matte shine. More information about the processing of this coating can be found in the Manual for matte floor coating.
Problems with the epoxy cast floor?
Didn't the floor work out completely? Read here what the cause could be and what the solution is to repair it. If in doubt, always contact our specialists, we will be happy to help you!
| Problem |
Cause |
Solution |
| Floor does not harden. |
No hardener added. |
Remove the floor and reapply with all components. |
| |
Incorrect mixing ratio. |
Remove the floor and reapply with the correct components and mixing ratio. |
| |
Too low temperature. |
Ensure a temperature of at least 15 degrees, warm the room and give it some extra time to harden. |
| Soft spots. |
Insufficiently mixed. |
Mix the casting mass with a powerful mixer for at least 5 minutes until it is a homogeneous mass. Remove the spots and apply a new layer. |
| |
Unmixed components have ended up on the floor. |
Do not scrape cans or allow them to leak onto the floor. Remove soft parts and apply a new layer. |
| Floor does not adhere / disappears. |
Wrong primer used. |
Remove the floor and apply the appropriate primer. |
| |
Moisture in the floor. |
Remove the floor, solve the moisture problem and start again. |
| |
Contaminated surface. |
Sand the surface and degrease it with ammonia diluted with water. Apply a new layer. |
| Product has hardened in the can. |
Overheated. |
For optimal processing time, pour the product as quickly as possible after mixing. The best processing temperature is around 15 to 20 degrees. |
Do you have any questions?
Do you have any questions about installing the epoxy cast floor yourself or are you interested in a no-obligation quote? Please feel free to contact our specialists. We are happy to help you with your project!


![Applying epoxy floor coating [manual]](/img/infopage/59.webp)


![Matt floor coating for epoxy cast floors [manual]](/img/infopage/97.webp)


