This is how to repair holes and cracks in your boat!
Is your boat damaged and do you want to repair it easily? In this article, we explain step by step how you can repair cracks, scratches or holes in the hull of your boat (below the waterline). In addition to a step-by-step plan, you will also read all about the necessary materials in this article. This way, you get to work with the right materials using an efficient method!
After reading this article, do you have questions about repairs to your boat or do you have doubts about the materials (and the quantity) that are suitable for your application? Please do not hesitate to one of our specialists for tailored advice!
Step-by-step plan for boat repair (below the waterline)
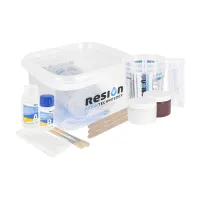
In the video below, product specialist Arne shows how to easily carry out a polyester repair. Here, he uses the Polyester repair kit. We have written down all the steps so you can read it again later.
Step 1. Map the damage
Before you start boat repair, it is first important to take stock of the damage. Check carefully where and what damage you have. Think of cracks, scratches or holes from removed equipment (such as a log or depth gauge).
After you have inventoried all the repairs, you can calculate how much material you will need to carry out all the repairs.
In this article, we discuss repairing damage to the underwater hull. For repairs to the superstructure, read the article: Repairing the superstructure!
Step 2. Chamfering off holes, cracks and scratches
Chamfer cracks and scratches with an 8:1 bevel. For small repairs, use a sander. For large repairs, an angle grinder with flap disc is indispensable. By beveling the edges, you promote the bonding surface.
Redundant holes should also be chamfered. In many cases, we recommend doing the repair from both the inside and the outside. It is then often chosen to first bevel the outside to about 2/3 of the hull thickness. Once the outside is repaired, you need to grind out and repair the inside.
After grinding, check that the cracks are not deeper than expected. Wet the sanding area and wipe it dry again. In a crack, water will stay longer and become visible again. Grind these cracks even deeper.
Finally, make a plug from, for example, a leftover piece of suture wood covered with tape or cardboard. This way you bridge the gaps of equipment.
Tip: it is also possible to use a fibre disc and adapter. A quick solution without having to invest a lot of money in equipment.
Step 3. Repairing damage with polyester and glass fabric
Tip: with the Polyester repair kit, you immediately have everything you need to carry out a polyester repair!
In this step, we are going to laminate the holes and cracks with polyester laminating resin combined with glass fibre. Always clean and dust the surface before you start laminating. In addition, make sure you always wear the right protective equipment while working with polyester. Always wear covering clothes, a suitable fume mask and nitrile gloves.
Repairing holes Add about 2% MEKP hardener to the polyester laminating resin and mix well in a clean mixing cup. While mixing, the polyester resin will slowly change colour.
Once you have mixed the polyester resin well, apply a layer of resin to the surface. Apply enough fibreglass chopped strand mat around the hole. Do this from large to small and vent the surface after each layer with a vent roller. After each layer of fibreglass, apply another layer of polyester resin. Work in this way layer by layer until the fabric is level with the surrounding surface. Now let the polyester resin cure completely.
For holes that are completely through the hull, after curing on the inside, the temporary plug can be removed and on the inside, the spot can also be sanded at an angle and laminated using the above method. The strength is now fully restored.
Repairing cracks You can easily repair cracks by making a paste of polyester laminating resin and glass fibres. Add about 2% hardener and the glass fibres to the polyester laminating resin base. Mix well to make a splashable paste. Now fill the crack with the paste and spread it well. Then let this cure completely.
Step 4. Follow-up
In the steps above, you have read how to do a polyester repair. Now that you have successfully repaired all cracks and holes, move on to the next step: filling the hull with epoxy putty.
More information about a repair above the waterline?
Do you still have questions about polyester repairs or about refurbishing your boat? Our specialists are ready for you! Feel free to ask all your questions via phone, email or live chat, we will be happy to help you with your project! Check out the other informative articles we have written on boat repair and recovery.
A gelcoat finish can get damaged and (spider and hairline) cracks and scratches can occur. Fortunately, it is easy to repair and Polyestershoppen has all the ne…
More information
Many polyester sailboats have a balsa core deck covered with polyester and fibreglass. In speedboats, a structure of trusses is often found, made of sheet mater…
More information
In this article, we explain how to get your boat's hull below the waterline smooth again after a major repair of holes and cracks. You do this simply by priming…
More information
Is your boat damaged and do you want to repair it easily? In this article, we explain step by step how you can repair cracks, scratches or holes in the hull of…
More information
In this article we explain how to protect the hull below the waterline with a hard antifouling from the brand International. Here we use International Interspee…
More information
In this article, we explain step by step how to go about DIY osmosis treatment and how to ensure your boat remains osmosis-free. Osmosis on boats and yachts has…
More information
Do you want to repair cracks, scratches or holes in your polyester boat yourself? Then quickly read this article! We are happy to explain to you what you can do…
More information
Does your boat need a fresh coat of paint of would you like to change the colour of your boat? In this article we explain how to apply a new paint system to a b…
More information
Want to repair gelcoat spider cracks? Small hairline cracks and spider-webbing in the polyester surface are annoying because they ruin the appearance of th…
More information
Gelcoat repair for your boat
Do you have damage to the gelcoat of your boat and do you want to repair it? No problem, then you have come to the right place at…
More information
Boat deck fittings can become loose over time and even cause leakage. Especially on boats with balsa decks, it is important that all fittings are installed prop…
More information
Want to repair the bottom of your polyester boat? At Polyestershoppen, you can find everything for optimal boat maintenance. From polyester to handy supplies, w…
More information
Over time, your boat, which used to be so beautifully shiny in the water, loses its shine due to all kinds of weather influences. The polyester or paintwork of…
More information
What is self-sharpening antifouling and how do you apply self-sharpening antifouling? In this article, you will read all about using self-sharpening antifouling…
More information
How do you quickly remove paint or antifouling from steel, metal or polyester? A good question, we thought. Because sometimes you want to tackle your boat and r…
More information
If the mirror in your boat is worn, damp or rotten, it is better to replace it. Fortunately, this is a job you can easily do yourself. We have written a handy s…
More information
What is the best boat paint? What boat paint is suitable for my boat? How do you apply a paint system? We regularly receive similar questions about painting boa…
More information
Do you want to repair your polyester boat? At Polyestershoppen, we know everything about optimal repair of polyester boats. We also sell all supplies. You can c…
More information
Are you going to refurbish a boat yourself? Then, first of all, it is important that you clean the boat properly before you continue sanding and repairing. In t…
More information
In this article, we explain step by step how to apply IJmopox HB Coating. This epoxy coating is used to protect against osmosis (polyester) and corrosion (metal…
More information
Do you want to sand your polyester boat? Then Polyestershoppen.nl is the place to be. Besides the fact that in our shop you will find everything to maintain you…
More information
In this article we will explain to you step by step how to make your own boat stand. This DIY boat stand ensures that the bottom will not be damaged when workin…
More information
A floor in your boat that is too slippery? Read in this article how to apply non-skid deck coating step by step so that you no longer slip. For other articles o…
More information
In this article, we cover the most frequently asked questions on boat maintenance. We answer questions on antifouling, primers, polishes and boat paints. For mo…
More information
What types of antifouling are there? And how do you apply the right antifouling to your boat? In this information article you will find everything about antifou…
More information
Have you just done a gelcoat repair or has the gelcoat of your car, boat or caravan become dull? You can easily polish a polyester gelcoat to bring back that be…
More information
What is the best primer and what primer is right for my boat? There are lots of different primers and we understand that choosing the right one can be quite tri…
More information
Hempel Silic One is the revolution in antifouling coatings. This biocide-free product has properties similar to those of an antifouling. However, Sili…
More information
Condensation on the boat hull can lead to mold. But how can you avoid condensation on the metal? This can be done by spraying a fine layer of PUR foam against…
More information
Do you want to combat underwater growth in an environmentally friendly way? Then the brand new International B-Free system is the perfect fouling release system…
More information


![Painting a boat with DD Paint [manual]](/img/infopage/45.webp)


