Want to make your own chocolates, pour a chocolate bar with your logo on it or create a special chocolate figure? A silicone chocolate mould opens up all kinds of possibilities. And did you know you can make the mould yourself?
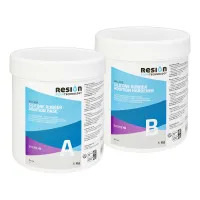
With RESION liquid silicone rubber, you can make flexible moulds that capture even the finest details. Think delicate patterns, letters or a 3D-printed figure. This silicone rubber has also been independently tested for suitability for food contact.
In this article, we'll show you how to make your own chocolate mould and then use it to cast chocolate. We'll also explain what to look out for and which type of silicone rubber to choose.
Make your own chocolate mould
Of course, there are plenty of ready-made chocolate moulds available. But perhaps you want to create something you can't buy in a shop: a chocolate bar with your company logo, for example, or chocolates in a special shape. By making your own silicone mould, you have complete control over the finished design. Silicone rubber is ideal for this. It picks up small details accurately and stays flexible after curing. This means you can gently bend the mould to release the chocolate. And a well-made mould can be used again and again.
For most chocolate moulds, we recommend RESION Shore 15 silicone rubber. It is flexible enough to make even more intricate shapes easy to demould. This silicone rubber has also been independently tested by TÜV SÜD for its suitability for food contact. It can therefore be used to make chocolate moulds and for other food-contact applications, provided you follow the processing instructions and the relevant food-contact conditions.
What do you need to make your own chocolates?
Before you get started, you'll need a few materials to make the silicone mould.
To make the silicone mould:
- RESION Shore 15 silicone rubber.
- A master model (the shape you want to reproduce).
- A mould box or frame for the silicone mould.
- Digital scales.
- Mixing cups and mixing spatulas.
- Nitrile gloves.
To make the chocolates:
- Couverture chocolate of your choice (high-quality chocolate with extra cocoa butter).
- A heatproof bowl and a saucepan.
- A kitchen thermometer.
- Optional: a piping bag and a scraper.
Step 1. Prepare the design and mould box
Before mixing the silicone, you'll need a master model. This is the shape you ultimately want to reproduce in chocolate. You could use a 3D-printed design, a plastic figurine, a metal object or sulphur-free modelling clay.
Make sure the master model is clean, dry and as smooth as possible. Silicone rubber will pick up small imperfections and even the layer lines of a 3D print. Bear in mind that some materials or coatings can interfere with curing, so test unfamiliar materials before you start.
Next, place the master model in a mould box. This is a container or frame that holds the liquid silicone while you pour it. Leave enough space around the model to give your mould strong walls. You can make a box from wood or acrylic sheet, for example, or use our reusable silicone mould box.
Step 2. Mix and pour the silicone rubber
Now it's time to make the silicone mould.
- Platinum-cure silicone consists of two components that you mix in a 1:1 ratio by weight. That makes measuring fairly straightforward. For example, to prepare 200 grams of silicone rubber, use 100 grams of component A and 100 grams of component B.
- Mix the two components gently but thoroughly for about 3 minutes. Be sure to scrape the bottom and sides of the mixing cup.
- Pour the mixture into a clean mixing cup and mix again.
- Slowly pour the silicone rubber into the mould box, preferably from one spot, and let it flow gently around your design. This helps minimise trapped air bubbles.
- At 20 °C, you have a working time of around 45 minutes, so there's no need to rush.
Step 3. Allow the silicone mould to cure
Leave the mould box on a level surface and give the silicone rubber time to cure. At a temperature of around 20 °C, RESION silicone rubber becomes tack-free after approximately 8 hours.
You can then carefully remove the mould box and take the master model out of the silicone mould. If everything has gone to plan, even the smallest details will have been reproduced. Before using the mould with food, check that the silicone has fully cured in accordance with the product instructions and the conditions of the food-contact declaration of compliance.
Step 4. Post-curing: preparing the silicone mould for food contact
Want to use your silicone mould for chocolate or other food products? After the normal curing process, an additional heat treatment is required. This is known as post-curing (post-cure). During this treatment, residual volatile substances are reduced further, helping the silicone mould meet the applicable requirements for food contact.
For RESION silicone rubber, we recommend the following general procedure:
- First, allow the silicone rubber to cure completely and remove the master model from the mould.
- Place the silicone mould in an oven at 200 °C for 4 hours.
- Use a well-ventilated oven suitable for this type of heat treatment.
- Allow the mould to cool completely after the treatment.
- Clean the mould with warm water and a mild detergent. Rinse thoroughly and allow it to dry completely before use.
Step 5. Melt and temper the chocolate
Your silicone mould is ready. Time to get the chocolate out!
For chocolates and chocolate bars, we recommend using couverture chocolate. It flows well, which makes it easy to pour into moulds. It's important to temper the chocolate properly first. Tempering means heating and cooling chocolate in a controlled way to stabilise the cocoa butter crystals. That might sound complicated, but a thermometer and a little patience will get you a long way. Properly tempered chocolate sets with an attractive shine and a satisfying snap when you break a piece off.
One common method is to melt around two-thirds of the chocolate over a bain-marie (a bowl set over gently heated water). Then gradually add the remaining finely chopped, properly tempered chocolate while stirring. The right temperature depends on the type of chocolate. Use the following figures as a guide:
| Chocolate type | Melting | Working temperature |
|---|---|---|
| Dark chocolate | 45-50 °C | 31-32 °C |
| Milk chocolate | 40-45 °C | 29-30 °C |
| White chocolate | 40-45 °C | 28-29 °C |
Step 6. Fill the chocolate mould
Once the chocolate is properly tempered, you're ready to fill the mould.
- Place the silicone mould on a level surface. With larger moulds, it's useful to put a rigid board or tray underneath. This lets you move the filled mould without it bending.
- Carefully pour the chocolate into the mould. A piping bag can help with small chocolates or shapes with lots of detail.
- Gently tap the mould a few times to bring any air bubbles to the surface. This is especially important with small letters and intricate patterns. You don't want a bubble to leave part of your logo missing!
- Use a scraper to remove excess chocolate so that the bottom is nice and flat.
Step 7. Remove the chocolate from the mould
Leave the chocolate to set in a cool, dry place. The time required depends on the type of chocolate and how thick your design is.
Once the chocolate is completely firm, you can carefully remove it from the mould. This is where the flexibility of Shore 15 really comes in handy. Gently bend the silicone mould to help release the chocolate, especially if your design has fine details. Try not to use too much force: thin, protruding parts of the chocolate can break easily.
Good to know: professional chocolatiers often use rigid polycarbonate moulds to create chocolates with a very high gloss. Silicone moulds are particularly useful for unusual, personalised or hard-to-release shapes. The final shine depends partly on the surface of the master model and how well the chocolate has been tempered.
Shore 15 vs Shore 40 for chocolate moulds
At Polyestershoppen, we offer several types of silicone rubber. Shore 15 and Shore 40 are particularly interesting for chocolate moulds. The main difference is the hardness of the cured material.
- Shore 15: flexible and easy to demould
Shore 15 is our recommendation for most chocolate moulds. Its flexibility makes it a great choice for chocolates, small figures and designs with fine details. You can easily bend the mould to release the chocolate without applying much force. - Shore 40: firm and dimensionally stable
Want to make a larger chocolate mould that needs to hold its shape? Choose Shore 40 silicone rubber. This silicone is much firmer (stiffer), making it useful for large chocolate bars or designs where consistent dimensions matter.
Both products have been independently tested by TÜV SÜD for their suitability for food contact. You can find the test reports and other documents on the silicone rubber product pages. Have more questions about the food-contact suitability of our silicone products? Feel free to contact our specialists!
How to keep your chocolate mould in good condition
The good news is that you can use a homemade silicone mould more than once. With a little care, it can last a long time. After use, clean it with warm water and a mild detergent. Avoid scouring pads or sharp objects, as they can leave small scratches that may show up in your chocolates later.
Let the mould dry thoroughly and store it somewhere clean and dust-free. If you use a mould for chocolate, keep it exclusively for food. A mould that has previously been used with epoxy, polyester or other chemicals should not be used for food.
Ready to make your own chocolate moulds?
Making your own chocolate mould is a fun project that gives you plenty of creative freedom. We hope you enjoy this delicious project! Still have questions after reading this article? Feel free to contact our customer service team. We're happy to offer advice, with no obligation. Want to learn more about silicone rubber suitable for food contact? Read our guide to making food-contact silicone moulds.