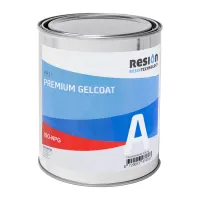
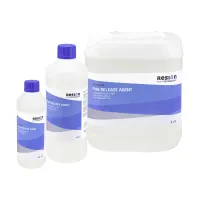
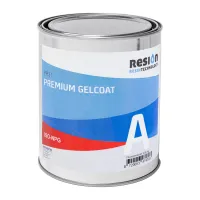
A new polyester mould can be more prone to sticking during the first production cycles. Even when the mould has been carefully finished and release wax has been applied, there is still an increased risk of adhesion during the first releases. That is why we recommend producing the first two parts in a new polyester mould using PVA release agent. Once dry, PVA forms a physical barrier film between the mould and the part. This reduces the risk of the production gelcoat adhering to the surface of the new mould.
After these first releases, the mould is usually sufficiently conditioned and you can switch to the normal release system.
Why can a new polyester mould stick?
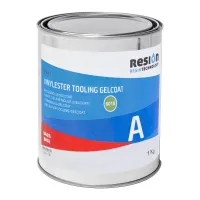
A new polyester mould behaves differently from a mould that has already been used several times. The surface of the mould gelcoat (tooling gelcoat) may still be slightly active during the first production cycles. This can cause unwanted adhesion between the mould and the polyester part, even when release wax has been used. As more parts are produced from the mould, this sensitivity decreases. This is known as 'conditioning the mould'.
This is why the first releases are particularly important. By using PVA as an additional barrier during these production cycles, you reduce the risk of the part sticking to the mould.
What is PVA release agent?
PVA stands for polyvinyl alcohol. PVA release agent is a liquid that forms a thin, physical film on the mould surface after application and drying. This film prevents direct contact between the mould surface and the production gelcoat. After demoulding, any remaining PVA film can be removed with water.
PVA is particularly suitable for:
- new polyester moulds;
- the first production cycles with a new mould;
- refinished or repaired mould surfaces;
- situations where additional security during demoulding is required.
PVA is not a substitute for proper mould preparation. With a new polyester mould, it is used as an additional barrier on top of a suitable release system.
Why is release wax alone not always enough for a new mould?
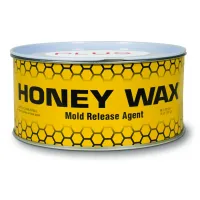
Release wax, such as Honey Wax, creates a separating layer between the mould and the part. On a properly conditioned and maintained polyester mould, a suitable release wax is generally sufficient. A new mould requires more attention. During the first production cycles, the surface may still be relatively active, which can result in adhesion even through the release wax.
PVA works differently from release wax. Once dry, it forms an actual film that physically separates the part from the mould surface. This is why combining release wax with PVA is particularly useful during the first production cycles.
The right number of release wax layers
How many layers of release wax does a mould actually need? More release wax does not automatically mean better protection. The most important thing is to treat the entire surface evenly.
For a new polyester mould, we recommend applying 5 to 7 layers of release wax before producing the first part. Allow each layer to dry according to the instructions and buff it thoroughly before applying the next layer. Multiple layers help achieve complete and even coverage of the mould surface. PVA is then applied over the prepared mould as an additional physical barrier film.
Conditioning a new polyester mould with PVA
You can use the following procedure to condition a new polyester mould.
- Allow the mould to cure sufficiently
Make sure the mould and mould gelcoat have cured sufficiently before producing the first part. Follow the curing instructions for the products used. - Clean and inspect the mould surface
The surface must be clean and free from dust, grease and other contaminants. Also check for damage or areas that still require finishing. - Apply release wax
Apply 5 to 7 layers of suitable release wax to a new polyester mould. Allow each layer to dry and buff it before applying the next layer. - Apply PVA
Apply PVA over the prepared mould. Make sure an even, continuous film forms across the entire surface. A film that is too thin, porous or missing in certain areas will not provide sufficient protection. The quality of the film is more important than the amount of PVA used. - Allow the PVA to dry completely
Do not apply the production gelcoat until the PVA film is completely dry. Drying time depends on factors including the applied layer, temperature, humidity and ventilation. - Produce the first part
Apply the production gelcoat followed by the laminate according to your normal procedure. Allow the part to cure sufficiently before removing it from the mould. - Demould the part and clean the mould
After demoulding, remove any remaining polyvinyl alcohol. PVA is water-soluble and can be removed with water.
Inspect the mould surface before preparing it again. - Repeat the process for the second part
Use PVA for the second part as well. After two production cycles with PVA, a new polyester mould is generally sufficiently conditioned to switch to the normal release system.
How to apply PVA correctly
How do you apply polyvinyl alcohol correctly? For reliable demoulding, PVA must form a completely continuous film. The quality and coverage of this film are more important than simply applying as much material as possible.
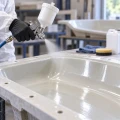
When spraying PVA, build up the film gradually and in a controlled manner. Start with light passes and gradually work towards an even, continuous film. Avoid dry areas, pinholes and other gaps. A very light mist is therefore not sufficient. Once dry, the PVA must form a continuous barrier between the mould and the part.
Do you want to apply PVA with a spray gun? Read our guide PVA spraying: how to apply an even film. It covers topics including the spray gun, nozzle size, spray pressure, spraying distance and the controlled build-up of the PVA film.
Common mistakes when using PVA
| Common mistake | Description | Solution |
| 1. Applying PVA too wet | If you immediately apply too much PVA when spraying, the liquid may run or form an uneven film in certain areas. |
Build up the PVA gradually with light passes until a continuous film has formed. |
| 2. Applying too little PVA | A barely visible mist does not automatically mean that the surface is sufficiently protected. Areas where the film is missing can still cause localised adhesion. | Check that the final PVA film is continuous across the entire surface. |
| 3. Not allowing the PVA to dry completely | Do not start applying the production gelcoat while the PVA is still wet. |
Allow sufficient time for the PVA film to dry and take temperature and humidity into account. |
| 4. Working on a contaminated surface | Dust, grease and other contaminants can interfere with the formation of an even PVA film. | Clean the mould carefully and avoid touching the prepared surface as much as possible. |
| 5. Continuing to use PVA unnecessarily | PVA is usually no longer necessary once a polyester mould has been properly conditioned. You can then switch to a suitable release wax or another release system suitable for your mould and production process. | After two production cycles, switch to a suitable release wax. |
Get your new mould off to a good start
The first releases play an important role in how reliably a new polyester mould performs in production. Pay close attention to preparing the mould surface, applying the release wax and creating a completely continuous PVA film.
Would you first like to learn more about making the mould itself? Read our guide How to make a polyester mould.
Do you still have questions about conditioning your polyester mould, using PVA or choosing the right release system? Please contact our specialists. We will be happy to help!