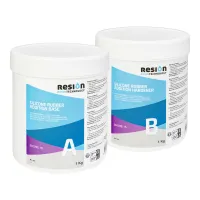
Imagine this: a chocolate mold bearing the exact logo of your bakery, or an ice mold with a custom dessert design found nowhere else. With food-safe silicone casting rubber from Polyestershoppen, you can manufacture these molds yourself!
More and more pastry chefs, chocolatiers, home bakers, and food startups are discovering the benefits of custom silicone molds. In this article, you will learn exactly what you need, what to watch out for, and how to get started step by step.
Why silicone is the best choice for culinary molds
There is a good reason why silicone casting rubber is the standard material in the professional food industry. Compared to rigid plastic or metal molds, silicone offers a range of practical advantages:
-
Flexible and easy release.
Complex shapes release effortlessly, even with fine details. -
Heat and cold resistant.
Silicone rubber is suitable for the oven, the freezer, and everything in between. -
Highly detailed.
Silicone captures even the finest textures from your master model. -
Durable and long-lasting.
When used correctly, silicone molds last for a very long time. -
Easy to clean.
No baked-on residue, no dried-out remains. -
Suitable for direct food contact.
Provided you use the correct, certified quality.
Especially for chocolate, sugar work, mousse, fondant, ice cream, and pastry art, silicone delivers results that are simply impossible to achieve with other materials.
Note: not all silicones are food-safe
This is the most common mistake made by beginners: grabbing any silicone casting rubber and assuming it is safe for food contact. But pay close attention, not every silicone is food-grade. For culinary applications, only use certified food-grade silicones. In practice, this is almost always an addition-cure silicone (also known as platinum silicone). This type of silicone contains no harmful substances that can migrate into food, complying with strict requirements for food-contact materials.
At Polyestershoppen, certified food-grade silicones specifically for culinary use are available in various Shore hardnesses. All platinum silicones from Polyestershoppen are food-safe and independently tested by DEKRA. You can use these silicones for applications including:
- Chocolate molds and bonbon molds.
- Ice cream molds and sorbet molds.
- Fondant and sugarcraft molds.
- Baking molds for pastry and desserts (pastry art).
- Silicone molds for catering and small-scale production.
Which Shore hardness should you choose for your application?
The Shore value measures the hardness of the silicone. For culinary applications, two primary hardness ranges play a key role:
Flexible silicone: Shore A15 (most common)
This silicone is ideal for:
- Molds with complex geometries and delicate details (such as chocolate figures or decorative dessert molds).
- Fragile items that need to release effortlessly from the mold.
- Organic shapes with undercuts where harder molds would tear or stick.
Semi-rigid silicone: Shore A40
This silicone is ideal for:
- Universal baking molds for more intensive daily use.
- Ice molds and mousse rings.
- Production environments in bakeries or food services where molds are used repeatedly.
How to make a food-safe silicone mold [step-by-step guide]
What do you need?
- Food-grade silicone casting rubber (component A + B)
- Mixing cups and an accurate scale
- Mixing spatulas
- Master model (3D print, sculpture, or existing object)
- Containment frame materials (e.g., foam board, wood, LEGO bricks, or reusable mold housing walls)
- Release agent (only if the model is porous or absorbent)
Step 1: Create a master model
The master model determines the final result of your mold. Use a clean, dry, and smooth surface. Popular options include 3D-printed models, clay sculptures, or existing objects. Note: the model must contain no grease or moisture, as these interfere with the silicone cure.
Step 2: Build containment housing
Create a watertight barrier around the model so liquid silicone cannot escape. Ensure there is at least 1 to 1.5 cm of clearance between the model and the containment walls on all sides.
Step 3: Mix the components accurately
Weigh components A and B carefully according to the exact mixing ratio on the packaging (often 1:1 by weight). Mix thoroughly yet gently for at least 3 minutes until the mixture is completely homogeneous. Inadequate mixing leads to sticky spots or incomplete curing.
Step 4: Pour slowly from one point
Pour the silicone slowly and steadily from a single corner of the housing. By pouring in a thin stream, trapped air bubbles can escape, preventing voids in the mold. Fill the housing until it rises just above the highest point of the model.
Step 5: Allow full cure
Let the silicone cure at room temperature for the time specified by the manufacturer. For most food-grade silicones from Polyestershoppen, this is approximately 8 hours. Do not demold early, even if the exterior feels solid.
Step 6: Demold and clean
Gently peel the mold away from the model. Clean the mold thoroughly with warm water and mild soap before using it with food for the first time. Allow to dry completely before starting.
Common mistakes (and how to avoid them)
| Mistake | Consequence | Solution |
| 1. Using non-food-safe silicone. | Risk of harmful substances migrating into food. | Always choose certified food-grade silicone casting rubber. |
| 2. Incorrect mixing ratio. | Sticky or soft spots, incomplete cure. | Use a scale and never mix by eye. |
| 3. Demolding too quickly. | Risk of tearing the mold. | Observe the full cure time (approx. 8 hours). |
| 4. Ignoring temperature limits. | Mold deforms in the oven or freezer. | Always verify the temperature range of the silicone. |
| 5. Porous model without release agent. | Model sticks permanently inside the mold. | Apply a thin coat of release agent when in doubt. |
For professional production: custom silicone molds
DIY silicone molds are not just for hobbyists. For larger volumes, silicon casting rubber is the ideal choice for:
- Bakeries and pastry shops looking to stand out with unique product lines.
- Chocolatiers with proprietary seasonal or branded collections.
- Ice cream producers manufacturing custom shapes for retail or food services.
- Food startups prototyping and scaling new products.
- Restaurant chains with branded dessert presentations.
- Wholesalers producing molds for food processing.
Buy food-safe silicone at Polyestershoppen
For culinary applications, you need the right product. Polyestershoppen supplies a comprehensive range and is happy to help you refine your production process.
- Extensive selection of food-grade silicone casting rubbers in various Shore hardnesses
- DEKRA-certified quality complying with strict safety standards
- Expert technical advice on product selection, mix ratios, and processing
- Fast delivery from stock
- Personalized assistance for custom projects targeting both hobbyists and professional users
Explore our complete range of silicone casting rubber for food applications or reach out for tailored advice.
Ready to make your own food-safe silicone molds?
Making your own food-safe silicone molds is more accessible than most people think, as long as you use the right materials and follow a few basic guidelines. Whether you want to create a custom chocolate shape for your shop, a personalized ice cream mold for your restaurant, or simply experiment as a home baker, the products and guidance from Polyestershoppen are always the right first step!
Have questions about food-safe silicones? Feel free to contact our specialists!