Varnishing a wooden front door with Epifanes Clear Varnish

A wooden front door has a lot to endure. Sunlight, rain, and temperature fluctuations stress the wood and its finish all year round. With a properly built clear varnish system, you protect the wood while keeping its natural grain visible.

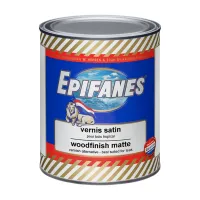
Looking for a matte finish? You can combine Epifanes Clear Varnish with Epifanes Woodfinish Matte. Use the high-gloss clear varnish to build up protective layers, followed by Woodfinish Matte for the final matte appearance. In this article, we explain step by step how to treat a wooden front door starting from bare wood. 


Why apply high-gloss varnish before matte varnish?

Finishing a matte front door directly from bare wood using only matte varnish is not the correct approach. For an exterior door, sufficient coat thickness is essential to protect the wood against weather conditions and UV radiation.

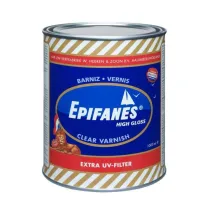
That is why you build up the varnish system first with Epifanes Clear Varnish. This high-gloss single-pack varnish contains a UV filter and forms multiple protective layers over the wood.

If you ultimately want a matte appearance rather than high gloss, finish the built-up high-gloss layers with Epifanes Woodfinish Matte. This matte single-pack varnish also contains a UV filter and serves as an ideal matte topcoat for exterior wood when applied over a suitable high-gloss varnish base.

For a matte front door starting from bare wood, we recommend:

This approach combines the required film thickness with a refined matte look.


What do you need?

To varnish a wooden front door, you will need the following items:

For clear varnishing, preferably use a good soft brush with long bristles. This allows you to apply sufficient coat thickness and helps the varnish flow out smoothly.


Step-by-Step Guide

Follow the steps below to properly treat your door with clear varnish. You can also watch the Epifanes video where they walk you through every step.

Step 1. Remove the old coat of varnish

  • For a full restoration, start with bare wood. Completely remove old, degraded, or damaged layers of varnish. 
  • Sand the surface evenly, working in the direction of the wood grain. If there are damaged areas or severe unevenness, sand with a coarser grit first and gradually work up to finer grits.
  • For bare wood, we recommend sanding progressively from P100 to P220. Very uneven wood can be pre-sanded with P60–P80. Pay special attention to corners, edges, and moldings. Any remaining varnish residues will become clearly visible once clear varnish is applied.

Step 2. Clean and degrease the wood

  • Good surface preparation largely determines the adhesion of the varnish system. The wood must be clean, dry, and free of grease before varnishing.
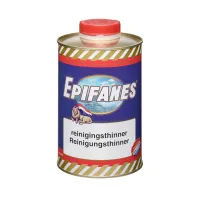
  • The choice of degreaser depends on the wood species. Oily timbers like teak and iroko require extra care. Use a suitable cleaning thinner and clean cloths for this.
  • Allow the surface to evaporate completely after degreasing before proceeding.

Step 3. Apply the first coat of Epifanes Clear Varnish

  • On bare wood, the first coat must penetrate deeply into the surface. Thinner should be added to the first coat according to the specified varnish system and product instructions.
  • Apply the varnish evenly using a clean brush. Work systematically and brush in the direction of the wood grain. Avoid overbrushing. Once evenly distributed, let the varnish flow out naturally.
  • Pay careful attention to edges, corners, and profiles. Ensure adequate coverage without creating sags or heavy accumulations.

Step 4. Build up multiple coats of clear varnish

  • A single coat of clear varnish is not enough to protect an exterior door over the long term. Protection is built by applying multiple coats.
  • For a matte finish, start by applying 5 coats of high-gloss varnish. Always adhere to the recommended drying and recoat times between applications.
  • Inspect the door between coats for dust particles, imperfections, or runs. Sand when required by the varnish schedule and thoroughly remove dust before applying the next layer.
  • It may seem counterintuitive to apply high-gloss coats when aiming for a matte front door, but these base coats are necessary to build sufficient film thickness and protection. The final matte appearance is determined by the topcoats.

Step 5. Sand before applying the matte finish

  • After building up the high-gloss layers, prepare the surface for Epifanes Woodfinish Matte.
  • Sand the final high-gloss coat carefully to smooth out imperfections and ensure optimal adhesion for the matte varnish. Thoroughly remove all sanding dust to restore a clean surface.
  • Take your time here. Tiny dust particles, sanding scratches, or surface defects will remain visible in the final topcoat.

Step 6. Apply Epifanes Woodfinish Matte

  • Now the matte topcoat can be applied. Epifanes Woodfinish Matte is a fast-drying, scratch- and wear-resistant single-pack varnish featuring a UV filter.
  • Apply a minimum of 2 coats of Woodfinish Matte over the high-gloss base coats. Spread the varnish evenly with a suitable brush, working along the grain.
  • Woodfinish Matte offers a coverage rate of approximately 13 m2 per liter and can be recoated after roughly 12 hours under normal conditions.

Prevent gloss variations in the matte topcoat

Even application is vital when working with matte varnish. Variations in coat thickness can lead to uneven gloss levels across the surface. Stir Woodfinish Matte thoroughly before and during application so the matting agents stay evenly distributed. Apply the varnish as uniformly as possible. On larger surfaces, work systematically to avoid laying fresh coat over varnish that has already begun to dry.


Don't forget the door edges

When treating a wooden exterior door, focus is required beyond just the main visible faces. Give equal attention to the top, bottom, and side edges of the door. The goal is a continuous protective varnish layer encapsulating the wood. End-grain areas need extra attention because they absorb moisture more readily.

Check during every coat application that these perimeter sections receive adequate coverage.


How to maintain a clear varnished front door?

Even a well-built varnish system requires periodic maintenance. UV radiation and weathering continuously strain the exterior coats. Do not wait until the varnish breaks down completely or peels off. Inspect your front door regularly. If you notice wear or dullness while the underlying coats remain intact, clean and sand the surface before applying fresh maintenance coats. Timely maintenance prevents the need to strip down to bare wood in the future.


High-gloss protection with a matte appearance

With a matte wooden front door, a major part of the protection lies beneath the visible finish. First, build up multiple coats of Epifanes Clear Varnish from bare wood. After that, at least 2 coats of Epifanes Woodfinish Matte deliver the desired matte appearance.

Proper preparation, sufficient film thickness, and regular maintenance matter far more than rushing to the final coat. Building the full system step by step ensures the wood stays protected while preserving the natural beauty of the front door.


Questions about clear varnish?

Do you have further questions about Epifanes clear varnishes after reading this guide? Feel free to contact our specialists. We are happy to provide personalized, non-binding advice!
Product advisor
  • Expert advice
  • Superfast delivery with PostNL
  • Pay after delivery

Products used in this article

Product 1 of the 3

DIY Projects with Epoxy, Polyester, and PU Foam

Here you can find all 35 related articles on this topic. Mis je informatie om aan de slag te gaan met jouw klus? Neem dan contact met ons op.

Polyester for Beginners Polyester for Beginners
What is polyester resin and what can you use it for? In this article, we explain the basics of working with polyester resin. At Polyestershoppen, you will find… More information
Epoxy for Beginners Epoxy for Beginners
At Polyestershoppen, you will find all the information you need about epoxy for beginners. Would you like to work with epoxy resin but don't you know where to s… More information
DIY | Making a Polyester Pond DIY | Making a Polyester Pond
Making a polyester pond has many advantages and is relatively easy to do yourself. If you make your own pond, you will save a lot of money! With the help of a… More information
Guide to Polyester Repair Guide to Polyester Repair
Polyester is a material that is easy to repair with materials that are easy to process. An average do-it-yourselfer can easily carry out polyester repairs. On t… More information
Covering an Object with Polyester Covering an Object with Polyester
Covering an object with polyester has a number of important advantages: the object is strengthened, becomes water-resistant and is easy to colorize. Coating wit… More information
Casting an Object in Epoxy Casting an Object in Epoxy
Do you want to cast an object in epoxy? Then you are in the right place. In this article we explain how you can properly protect an object against external infl… More information
How Do I Clean My Materials? How Do I Clean My Materials?
If you process polyester and epoxy resins on a regular basis, it is customary to clean all tools such as vent rollers, Japan spatulas e… More information
The Differences Between Fiberglass, Carbon Fibre, and Aramid Fibre The Differences Between Fiberglass, Carbon Fibre, and Aramid Fibre
To create a strong yet lightweight construction, a polyester resin or epoxy resin is combined with a reinforcing fibre. These reinforcing fibres are availa… More information
Repairing a Camper Roof Repairing a Camper Roof
Over time, (hairline) cracks may appear in the polyester roof of your camper causing roof leaks. Repainting often does not give the desired result, especia… More information
Coating an Object with Carbon (Overlay) Coating an Object with Carbon (Overlay)
Making a carbon overlay with real carbon fabric (carbon) is not difficult. In this article we explain step by step how to achieve optimal results!  Suppli… More information
Finishing Metal and Plastic with Double Coat DD Paint Finishing Metal and Plastic with Double Coat DD Paint
You can give a metal or pastic surface a fine finish with Double Coat DD Paint. In this article we explain step by step how to do this. DD Paint is a 2-componen… More information
How to Tint Gelcoat How to Tint Gelcoat
In order to achieve an almost invisible gelcoat, the new gelcoat to be applied must have the exact colour of the surrounding gelcoat. It is often not possible t… More information
How to Make a Polyester Mould How to Make a Polyester Mould
If you want to make multiple polyester products, you can use a mould. You can then work faster and more efficiently. It is important that the mould is of good q… More information
Repairing Rotten Wooden Window Frames with Epoxy Repairing Rotten Wooden Window Frames with Epoxy
Wood rot is a form of wood decay that occurs when wood is exposed to moisture for a long time. This moisture allows fungi to grow in the wood, which breaks dow… More information
Finishing Concrete Countertops and Sinks with Epoxy Finishing Concrete Countertops and Sinks with Epoxy
Epoxy finishing concrete countertops, sinks, water ornaments and garden statues is a good way to get a smooth surface that is waterproof and easy to keep c… More information
How to Waterproof a Wooden Hot Tub How to Waterproof a Wooden Hot Tub
Hot tubs are extremely popular for enjoying a relaxing soak in your own garden. Most hot tubs are made of wood, a material that not only provides excellent insu… More information
Covering EPS and XPS Foam With Epoxy Covering EPS and XPS Foam With Epoxy
EPS (Expanded Polystyrene) and XPS (Extruded Polystyrene), often referred to as styrofoam, Roofmate, or insulation board, are cost-effective materials that are… More information
Restoring Bakelite: Cracks, Fractures, and Missing Pieces Restoring Bakelite: Cracks, Fractures, and Missing Pieces
Bakelite is a hard, somewhat brittle plastic. It was widely used for steering wheels on cars and tractors, radios, household appliances, electrical switches, an… More information
Repairing a Plastic Shower Tray with Polyester or Epoxy Repairing a Plastic Shower Tray with Polyester or Epoxy
Plastic shower trays sometimes get damaged due to wear and tear, renovations, or age. In this article, we cover the most common types of damage and show you how… More information
Degassing Casting Resin with Vacuum | Tips & Guide Degassing Casting Resin with Vacuum | Tips & Guide
After mixing silicone rubber, epoxy casting resin or polyester casting resin, a lot of air can enter the material. These air bubbles can lower the quality… More information
DIY | How to Make a Cosplay Shield DIY | How to Make a Cosplay Shield
How do you make your own beautiful shield that you often see on TV or at cosplay conferences? You can make one out of metal but that is very heavy and not easy… More information
DIY | How to Make an Aquarium Background with Epoxy DIY | How to Make an Aquarium Background with Epoxy
As an aquarium or terrarium fan, you will probably want to make your own back wall. The advantages are that a homemade back wall always fits exactly and looks e… More information
Epoxy Tips for a Perfect Bathroom Finish Epoxy Tips for a Perfect Bathroom Finish
Many Polyestershoppen customers have now renewed their bathrooms using epoxy. You can do various jobs in your bathroom with, for example, our epoxy floor coati… More information
Insulating a Bus with Sprayable PU Foam Insulating a Bus with Sprayable PU Foam
Do you want to convert a van into a camper van or use it as a refrigerated vehicle? Then you need to insulate the van well to limit the costs of keep the van a… More information
Insulating a Roof with Sprayable PU Foam from Froth-Pak Insulating a Roof with Sprayable PU Foam from Froth-Pak
High energy bills? Time to do something about it! Of course, there are many steps you can take to make your home more energy-friendly. In many old houses or ol… More information
How to Laminate a Surfboard with Carbon Fibre and Epoxy How to Laminate a Surfboard with Carbon Fibre and Epoxy
In order to achieve a perfect laminate and ideal fibre to resin ratio, the industry often uses the vacuum wet bagging method. This method involves applying a va… More information
Bonding Various Materials Bonding Various Materials
Are you looking for the right products to bond different materials? We have a wide range of professional adhesives for bonding metal, iron, aluminum, wood, plas… More information
Tips and Tricks for Working with Froth-Pak Insulation Foam Tips and Tricks for Working with Froth-Pak Insulation Foam
In this article you can read everything about PU foam from Froth-Pak. We explain to you what the benefits of Froth-Pak are and what you need to process it. We h… More information
Wood Stabilisation with Stabicure: The Solution for Strong and Durable Woodd Wood Stabilisation with Stabicure: The Solution for Strong and Durable Woodd
Stabicure is a revolutionary method in the field of wood stabilisation. It is a process in which wood is impregnated with a special resin, also known as "c… More information
DIY | Make Your Own Epoxy Putty DIY | Make Your Own Epoxy Putty
Epoxy putty (filler) is a versatile and durable material that is often used to fill cracks, holes and other irregularities in various surfaces. Did you know tha… More information
Container Insulation with Froth-Pak PU Foam Container Insulation with Froth-Pak PU Foam
Insulating a container is an essential step for maintaining temperature and protecting it from external influences. In this article, you can read how to easily… More information
Bonding Polyethylene (PE) and Polypropylene (PP) Bonding Polyethylene (PE) and Polypropylene (PP)
Polyethylene (PE) and Polypropylene (PP) are notoriously difficult materials to bond. Common adhesives do not work, epoxy does not adhere to them and welding is… More information
Protecting Wood with Epoxy and DD Paint Protecting Wood with Epoxy and DD Paint
We regularly receive questions about how to properly protect wood. In this article, you’ll learn how to optimally protect wood using a combination of epox… More information
Thickening Epoxy and Polyester? How to Choose the Right Filler! Thickening Epoxy and Polyester? How to Choose the Right Filler!
Although polyester and epoxy resins are naturally low-viscosity, it can sometimes be useful to thicken them with fillers for various applications. This is easil… More information
Varnishing a wooden front door with Epifanes Clear Varnish Varnishing a wooden front door with Epifanes Clear Varnish
A wooden front door has a lot to endure. Sunlight, rain, and temperature fluctuations stress the wood and its finish all year round. With a properly built clear… More information

Do you have a question about this article?

Do you have a specific question? Call one of our specialists for free advice +3185 0220090