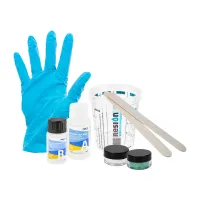
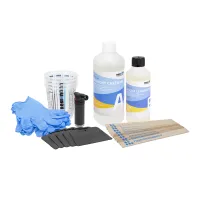
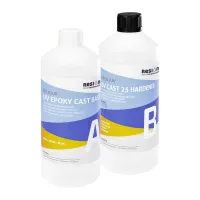
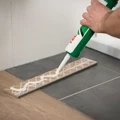
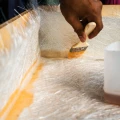
At Polyestershoppen, you will find all the information you need about epoxy for beginners. Would you like to work with epoxy resin but don't you know where to start? No problem, we will teach you how to use epoxy! In this article you will read all about epoxy and the processing of it and we will answer the most frequently asked questions. After reading all the information on epoxy for beginners, you can get started right away!
1. What is epoxy?
The most important question beginners ask is: "What is epoxy?" We would like to give you a clear explanation about this resin. Epoxy is a synthetic resin with very extensive possibilities. Epoxy consists of a liquid base component (resin) and a liquid hardener. After mixing both components, the material will harden into a hard, plastic-like material. The material is easy to process, even for the do-it-yourselfer.
2. Which epoxy do you need?
Polyestershoppen is the specialist when it comes to epoxy resins. We know that many people, learning to work with epoxy for the first time, find it difficult to decide which epoxy they need. At Polyestershoppen, we supply a very wide range of proprietary resins carefully tested for a wide range of properties and applications. We are happy to help epoxy beginners get started in making this decision. We have therefore listed the main resin systems and their corresponding applications:
| Application(s) | Properties | |
| RESION UV Resin Art Epoxy (LV) |
|
|
| RESION UV Resin Art Epoxy (MV) |
|
|
| RESION UV Resin Art Epoxy (HV) |
|
|
| RESION UV Epoxy Resin |
|
|
| Universele Epoxy |
|
|
| Winter Epoxy |
|
|
| Epoxy coating transparent |
|
|
| MasterCast 1-2-1 Artwork Resin |
|
|
| Epoxy casting resin for large castings |
|
|
| TotalCast Artwork Resin |
|
|
| Epoxy Floor primer |
|
|
| Epoxy Floor coating |
|
|
| Epoxy primer for smooth substrates |
|
|
| Epoxy Super Clear |
|
|
| Epoxy Foam |
|
|
| ZF Primer |
|
|
3. How to mix epoxy
Epoxy is a resin system that consists of 2 components, namely the resin and a hardener. It is important to add the right amount of hardener to the resin to get the best results. There is no point in adding more or less hardener to affect the curing time. The only effect is that the epoxy remains soft or even fails to cure.
Always weigh the epoxy with a scale. Then mix both components well. The epoxy should become completely clear again in the process. The video below shows the instruction for the 2-cup mixing method.
4. Processing epoxy
Processing time
The processing time used for epoxy is essential. After mixing the resin and hardener, there is a certain time in which to use the epoxy. The processing time is stated on this data sheet and on the product's label.
The processing time is affected by temperature (warmer = shorter processing time) and quantity (more = shorter processing time). After the processing time, the resin may take some time to fully cure. This again depends on the layer thickness (thinner = slower) and temperature (warmer = faster). Usually, the epoxy has cured sufficiently overnight for further processing. However, if the nights are cold, it may take longer.
Epoxy can be processed by brush or roller or can be poured. After processing, brushes and rollers should be discarded. Reuse is hardly possible. Other tools can be cleaned with acetone or vinegar.
Coating
Mixing the epoxy using the 2-cup mixing method prevents unmixed epoxy on your workpiece. This may remain sticky after curing or even cure incompletely.
On absorbent substrates (wood, stone), apply a primer layer first. This can be done with the same resin by applying it thinly. After 8 hours but within 24 hours work can be continued. Wooden substrates should be lightly sanded first.
Apply the epoxy with a velvet roller. Roll it out crosswise, using gentle movements. Epoxy is thicker than lacquer, too fast movements will leave too much air behind. Try to work quite thin. If necessary, you can brush on the epoxy with a brush for a smooth and bubble-free result.
Lamination
Epoxy can be combined well with glass fabric, aramid fabric and carbon fabric. A combination of fabric and epoxy is called lamination. The process of making this is called laminating. The laminate can be used as a covering for objects or, if thick enough, as a structural material.
A laminate is always made against a mould or shape. With cladding, this is the material being clad. For structural parts, this is often a mould. Wet the mould with prepared epoxy and lay the glass fabric inside. From the centre, work the folds out of the fabric. The epoxy will impregnate the fabric. Areas that do not have enough resin will remain white if glass fabric is used. With carbon fabric and aramid fabric, this will not be visible. The experience of the person working with epoxy will determine the quality of the laminate.
Apply more epoxy to the white spots. Shiny spots, on the contrary, have too much epoxy. The epoxy can be redistributed with a laminating spatula. The structure of the fabric should remain visible. After laminating, a vent roller can be used to roll the air out of the fabric.
Another layer of fabric can then be applied and impregnated in the same way. This can be repeated until the desired thickness is reached.
Gluing and filling
Epoxy makes a very good adhesive. Epoxy adheres to many surfaces and is very strong. The resin mixed with hardener is often too thin to fill a glue seam and is therefore often thickened with fillers. The most commonly used fillers for bonding are cotton fibre to bond wood and stewathix to bond other materials. Make sure the surface is well prepared: sanded, clean and free of dust.
If you use the fillers white microballoons and red microballoons, you will get a light putty. This is easy to apply and easy to sand.
Need help?
Want to know more about epoxy or about epoxy for beginners? The specialists at Polyestershoppen will be happy to help. Send us a WhatsApp message or send an email to support@polyestershoppen.com. We will provide you with professional, personal and appropriate advice.