DIY | Lifecasting a 3D hand with alginate and plaster
You can easily make a plaster cast of your own hand or foot. Or of someone else's hand. This way, you can immortalize the memory of a loved one in a beautiful sculpture. In this DIY guide we explain which steps are necessary and which materials you can use.
Do you have questions about making alginate rubber moulds or about body casting? Contact our specialists. We are happy to help you!
What do you need for a plaster cast?
At Polyestershoppen.com you will find all the necessary materials and auxiliary materials to make a great plaster cast of your own hand or foot. To make a mould of a hand, alginate rubber is needed. It is important to know that we supply skin-friendly alginate, so safety is guaranteed. Alginate is a natural product and is also biodegradable. You can make the mold without it being painful for you or your son or daughter!
To make a plaster cast of a hand, you need the following products:
Making a 3D plaster cast of a hand is very easy! Herman and Thijs show you in the video below what you need to do to achieve a good end result! In addition, we have written step by step instructions. Read the manual carefully or watch the video before you start.
Warning: alginate is a natural and moist product suitable for body casting. An alginate mould is suitable for moisture-resistant resin systems such as plaster or Acrystal, but NOT for epoxy. Please use skin-friendly silicone rubber for epoxy body casting.
Step 1. Clean your hands
Before you start making an alginate mould, it is important to clean your hands well. Do this with soap and water. You must have very clean hands and nails because otherwise you will see impurities in your mould.
Step 2. Calculate how much alginate rubber you need
Before you proceed, determine how much alginate powder you think you will need. Alginate has a mixing ratio of 1:3. So for 1 part by weight of alginate powder you have to add 3 parts by weight of water. The table below shows the approximate amount of alginate you need.
Always choose a mixing cup that best suits the mould you want to make. One hand is best made in a large mixing bowl, but for two hands you'd rather use a small bucket.
Water
Alginate powder
Total
Small hand
750 grams
250 grams
1000 grams
Large hand
1500 grams
500 grams
2000 grams
Two hands
2000 grams
660 grams
2660 grams
Step 3. Make alginate rubber
Now that you know how much alginate rubber you need, you can start making the mould! Follow these steps:
Now slowly add the alginate powder to the water and mix at a low speed. The processing time of alginate is 4-5 minutes at a temperature of 20°C.
Slowly continue adding the alginate powder until you have mixed everything in the mixing cup. Remember to scrape along the edges and bottom of the mixing cup while mixing.
Tip: it is important that you add the alginate powder slowly. This will prevent air bubbles in your mould. Add the powder to the water and not the other way around.
Step 4. Make the mould
After mixing well, place your hand or foot in the mixture of alginate powder and water. Now leave your hand or foot in the mixing cup or bucket for 10 minutes without moving much. Set a timer on your phone so you can keep track of the time.
Tip: squeeze your hand tightly when you make a fist.
Step 5. Remove your hand or foot from the mould
When the alginate has hardened, you can remove your hand or foot from the mould. Alginate hardens very quickly, so you only need to sit in the mixture for 10 minutes. You can remove your hand or foot by moving it in the mould, you can exert quite a bit of force on it. Of course, do this carefully so that you don't damage anything.
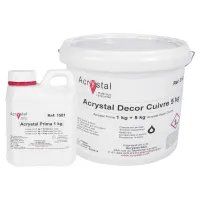
Step 6. Make Acrystal or Porcelain plaster
You can pour different materials into the mould you just made. For example, Acrystal or porcelain plaster. Acrylic is a harder material compared to porcelain plaster. Here's how to use both materials:
Acrystal is available in different colours. You can give your plaster cast a grey plaster look, but you can also give it a bronze, copper or marble look. View our Acrystal range for all colours.
Did you know that Acrystal Aqua is water resistant? This way, your figurine is always resistant to water, ideal for an aquarium, for example.
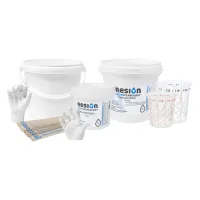
Have you purchased the 3D hand casting kit? It comes with Porcelain plaster.
Using porcelain plaster is also very simple:
Measure out the right amount of powder and water according to the mixing ratio (1 part water and 3 parts plaster powder).
Gently sprinkle the porcelain plaster into the water.
Wait at least 20 seconds for the plaster to be fully absorbed.
Stir the mixture well without knocking air bubbles into it (mix larger quantities by machine).
Pour the mixture into the mould with a thin stream.
Let the cast harden for about 30 minutes before removing it from the mould.
Step 7: Casting the plaster cast
You're almost done! All you have to do now is to slowly pour the prepared Acrystal or porcelain plaster into the mould. Make sure you do this slowly to avoid air bubbles in the mould. Gently move the mould up and down so that you spread it well and the entire mould will fill up.
After approximately 1 hour it has completely hardened and you can remove the casting from the mould.
Cut the alginate mould in half so you can pull it open.
Remove your plaster figurine from the mould.
Congratulations! You now have your own 3D plaster cast of your hand or foot!
More information about bodycasting?
Do you want to know more about making a plaster cast of a hand? Please feel free to contact our specialists. We are happy to advise you!