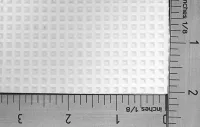
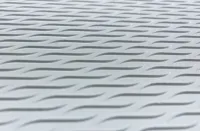
Do you want to professionally repair or renew the non-slip surface of your boat? With Gibco Flex-Mold, you can easily recreate the original non-slip patterns with a perfect finish. In this article, we explain step by step how to use Flex-Mold in combination with the correct coloured topcoat.
What is Gibco Flex-Mold?
Gibco Flex-Mold is a reusable rubber mould with a realistic non-slip pattern. These moulds are widely used in professional boatbuilding and repairs because they create a perfect texture that is almost indistinguishable from the original.
Polyestershoppen is an official distributor of the original Flex-Mold non-slip moulds.
Repairing with Flex-Mold [step-by-step-plan]
Required materials:
- Gibco Flex-Mold Repair (with the correct pattern)
- Polyester Topcoat in the desired colour
- Polyester hardener (MEKP)
- Release wax
- Talcum powder
- Flex-Mold Squeegee
- Tape
- Mixing cups
- Mixing spatulas
- Nitrile gloves
- Respirator with A2 filter
- Router with end mill
- Heat gun (optional)
Step 1. Choose the correct Flex-Mold pattern
Check which pattern you need for your deck and order the matching Flex-Mold easily online from Polyestershoppen. We are the exclusive online distributor in Europe and carry the full Gibco range. If you’re unsure which pattern suits your deck, contact our specialists — we’re happy to help you make the right choice!
Step 2. Prepare the repair area
For major damage such as holes or cracks, you must first repair the area:
- Sand the damaged area at an angle.
- Repair the damaged area with fibreglass chopped strand mat and polyester laminating resin.
- Sand the repair flat to just below the lowest level of the non-slip surface.
- Finish the repair with topcoat in the desired colour.
For minor damages, it is often sufficient to apply topcoat directly to the damaged area.
Step 3. Apply release wax
Apply a suitable release wax around the repair area on the deck. This prevents excess topcoat from sticking to the deck later in the process and makes removal easier.
Step 4. Mill out the damaged area
Use a router with a bit cutter to remove the damaged area down to the base of the non-slip profile. The result after this step is a flat surface in the colour of the topcoat, level with the bottom of the non-slip pattern.
Step 5. Place the new Flex-Mold on the repair
Cut a piece of Gibco Flex-Mold to size and fit it over the repair area. Tape one side of the mat as a ‘hinge’ and roll back the mould. Ensure the pattern aligns perfectly with the original texture.
Step 6. Apply the topcoat
Follow the steps below to apply the topcoat:
- Pour the desired amount of topcoat in the chosen colour into a mixing cup.
- Add 2% MEKP hardener and mix thoroughly.
- Roll the mould towards the hinge point and apply a small amount of topcoat at the hinge. Work the topcoat into the hinge using a stir stick.
- Roll the mould further into the topcoat, ensuring a small wave of topcoat runs ahead of the Flex-Mold.
- Add extra topcoat if necessary.
Step 7. Press the repair firmly
Dust the back of the Flex-Mold with talcum powder for smooth sliding. Use a spatula or Gibco Rubber Squeegee to firmly press the mould, filling the pattern completely with topcoat. Excess topcoat will flow out along the edges.
Step 8. Allow to cure and finish
Smooth out the Flex-Mold and allow the topcoat to cure for approximately 2 hours. Optionally, use a heat gun to accelerate curing. Carefully remove the Flex-Mold and remove excess topcoat. Because the surrounding deck is coated with wax, the topcoat can be easily removed with a wooden spatula.
The result?
If all steps are followed correctly, the repair is virtually invisible. Your non-slip deck will look as good as new!
Questions about Flex-Mold repairs?
Feel free to contact our specialists! We are happy to provide advice and supply all necessary products and materials directly from stock.
At Polyestershoppen.com you’ll find everything you need to professionally restore non-slip surfaces: