If you want to make multiple polyester products, you can use a mould. You can then work faster and more efficiently. It is important that the mould is of good quality, this applies to both the shape stability and the surface quality. The right materials and working methods are therefore crucial to achieve a good end result. But how do you make a polyester mould? In this article we explain step by step how to make a polyester mould yourself. Follow the following steps to make the mould in an efficient and professional manner:
- Step 1. Make a model (plug) for the polyester moulds.
- Step 2. Apply release wax.
- Step 3. Apply mould gelcoat.
- Step 4. Laminate the skin coat.
- Step 5. Laminate the mould resin.
- Step 6. Make reinforcements and supports.
- Step 7. Coat the back of the polyester moulds.
- Step 8. Make the first products in the new mould.
Step 1. Make a model (plug) for the polyester moulds
If you are going to make a polyester mould, you are supposed to first make a model. Such a model is called a "plug". This plug is an exact copy of the final product but does not need to have great strength. You can make the plug with different materials such as plaster, wood, MDF, foam, metal or another polyester product. Combinations of the mentioned materials are of course also possible.
Make sure the model is properly tailored. The dimensions of the plug are reflected in all products that are made in the polyester moulds. So pay sufficient attention to this and work meticulously. You can tighten the plug with polyester putty or epoxy putty.
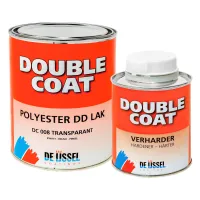
Finish the plug with De IJssel DD Paint. This lacquer is highly resistant to chemicals, such as styrene, that are found in mould making materials. To finish the plug with DD Lak, you often have to use a primer to ensure that the surface adheres well to the paint. For example, you can use HB Coating or universal epoxy as a primer. HB Coating is a high-build primer that makes it possible to remove the last imperfections in the plug. We have also written an information article about finishing with Double Coat DD Paint.
Once the varnish is neatly on the plug, allow it to harden for 5 to 7 days before moving on to the next step. You can polish the paint after 4-5 days if desired.
Step 2. Apply release wax
To separate the plug and the mould, we recommend using Stoner Miracle Gloss release wax (formerly Meguiar Mirror Glaze). This release wax has a wide range of applications and can withstand mould temperatures of up to 105ºC. You can apply this product as follows:
- Apply a thin layer in a circular motion. Use an applicator sponge or soft cloth for this.
- Let the wax evaporate for about 1-2 minutes, it will now become dull.
- With a clean cloth you can "break the surface" by scrubbing the surface quickly. Don't brush out the laundry yet!
- After 10-15 minutes, polish the plug again to a high gloss with a clean cloth.
- You can repeat these steps at 2 hour intervals until 4 or 5 coats of release wax have been applied.
- Now let the plug rest for 24 hours.
Step 3. Apply mould gelcoat
Mould gelcoat is the basis for professional polyester moulds with a high gloss and good scratch resistance. This gel coat ensures that products are removed from the mould without difficulty and are of high quality.
Mix the mould gelcoatwith approximately 2-2.5% polyester hardener and apply with a brush (not with a roller). Use approx. 0.3-0.4 kg of gelcoat per m2. Make sure the gelcoat is spread well, without brush marks or marks. This can lead to problems when applying the next layer. Allow this layer to harden for at least 2 hours and a maximum of 24 hours.
Apply another layer of gelcoat (with hardener). This can be done with a roller or brush. Allow this layer to harden again for at least 2 hours and a maximum of 24 hours.
Step 4. Laminate the skincoat
Optionally, a so-called "skin coat" can now be applied. This layer ensures even better heat resistance of the mould. Larger and thicker polyester products in particular can become warm during production. The skin coat can help keep the mould in top condition.
Mix vinylester resin with hardener (2%) and use this to laminate a layer of glass fibre 30 gr/m2. Pay a lot of attention to de-aerating this layer and let it harden for at least 2 hours. After curing, you can cut or sand any air bubbles so that the next layer of vinyl ester can fill these air bubbles. If you apply the next layer of vinyl ester within 4 hours, sanding is not necessary. If you wait until the next day, sand the surface with 80 grit.
The next layer is fibreglass chopped strand mat 225 gr/m2 that you process with the same vinyl ester resin. Deaerate this layer carefully as well and allow the vinylester to harden until the next day. Then sand it again with 80 grit sandpaper.
Step 5. Laminate the mould resin
Mould resin is a resin that can be applied without shrinkage thanks to a special additive. With this resin, 4 layers of glass mat can be applied in 1 pass. The heat generated during curing ensures that shrinkage is minimized.
Mix mould resin with hardener (1-1.5%) and laminate 4 layers of fibreglass chopped strand mat 450 gr/m2 wet on wet with this resin. Vent well between layers. You need approximately 1.4 kg of mould resin per layer.
The total thickness is now approximately 6 mm. This is sufficient for small moulds. For large moulds, you can apply several sets of 4 layers after curing. If you create the layers later than 4 hours after curing, you can sand the surface before proceeding with laminating.
Step 6. Make reinforcements and supports
If you have a larger mould, you can provide it with reinforcements and supports. This means that the mould can easily be set up on the workbench or on the ground, possibly on mobile moulds. These reinforcements can be made of steel or wood. Make sure that the reinforcements are placed at strong points in the mould, such as the edges, corners and flanges. This is to prevent marking of the supports in the surface of the mould.
You can attach the reinforcements and supports in 2 ways:
- By laminating with glass mat and mould making resin to the steel or wooden structure. To do this, sand the surfaces of the wood, steel and the mould with grit 80. Glue the structure to the mould with thickened mould building resin (thicken with Stewathix) and ensure that transitions between the mould and the reinforcements are neatly rounded. Once this has hardened, glass mats and mould building resin can be used to laminate the structure into place.
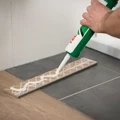
- By bonding the structure to the mould. Make sure that the reinforcement or support has a part that runs parallel to the mould, so that a large glueable surface is created. Use Tec7 adhesive kit to glue the stiffener in place.
Step 7. Coat the back of the polyester moulds
If the polyester moulds will also be placed outside, you must coat them. To do this, apply a layer of polyester topcoat to the back of the mould. This protects the mould making resin against the penetration of moisture. Mix the polyester topcoat with 2% hardener and roll this onto the back of the mould. After about 2 hours the mould is ready.
Step 8. Make the first products in the new mould
When polyester products are made in a polyester mould, it is advisable to make the first 2 products with PVA release agent. We recommend doing this because the surface of the mould can still be active, which can cause adhesion even through a release wax. After 2 releases, the surface activity has decreased and Meguiar Mirror Glaze 88 release wax (standard) or 87 (high temp) can be used to release products from the mould.
More information about polyester moulds?
In the above article you could read how to make a polyester mould for polyester products. Do you have any questions about the working method or the products after reading this article? Please feel free to contact our customer service team. They are happy to answer your questions to help you get started as best as possible!