How to design a penny floor
You may have come across them: epoxy coin floors. Often, these floors consist of hundreds of pennies. Some people even make patterns with the different colour tones. The toilet, kitchen or bathroom are great locations for a penny floor. The advantage of an epoxy floor is that it's very easy to keep clean and, of course, it looks super unique!
What do you need for an epoxy penny floor?
Step 1: Preparation
Before you start it is good to put on nitrile gloves, safety glasses and protective clothing or an overall. Also make sure that the room is well ventilated so you have fresh air while working.
If you wish to place the coins on a concrete or wooden floor, we recommend first applying a primer coat with Universal Epoxy rapid. This ensures that subsequent layers do not penetrate the wood or concrete and that no air causes bubbles. After 12 hours of curing, epoxy coating or epoxy casting resin can be applied.
It is important to bare in mind that the subfloor will be partly visible between the edges of the coins. For the most neutral effect, choose to apply a black epoxy coating first. You can also use a different colour as you wish. After 12 hours, the coating is hard enough to apply the coins.
Step 2: Apply the coins
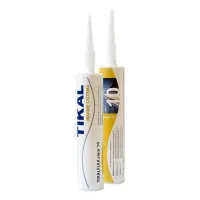
If the preparation is complete, the coins can be applied by using Tikalflex Clear 10 Adhesive Sealant. This glue sealant is transparent and adheres very well to coins and epoxy. Draw short lines of Tikalflex Clear 10 and apply the coins by pressing them down. Repeat until the entire floor is covered with coins.
Step 3: Apply the epoxy casting resin
Finally you need to apply epoxy casting resin. This epoxy layer ensures that the floor becomes firm and easy to clean. Epoxy can handle virtually any detergent, so it is ideal for use in areas such as kitchens, bathrooms and toilets.
Before epoxy casting resin can be applied, it is important to first check if there is a raised edge everywhere. If not, a raised edge must be made with wooden slats. Make sure it is firmly attached so that it does not shift while you apply the epoxy. Use packing tape on the wooden slat to prevent the wood from sticking to the epoxy.
If a vertical edge is present throughout, the epoxy casting resin can be mixed and poured. First add components A and B in a ratio of 100:60 (weigh the components carefully for the best final result). RESION UV Epoxy Resin is highly resistant to UV light, so there is no need to add a UV stabiliser when using this epoxy! Mix the two components thoroughly for two minutes in a mixing cup or bucket and don't forget the edges and bottom of the cup. If this is mixed well it can be poured. Make sure you spread the epoxy well and that it is around 5mm thick everywhere and spread it out using a laminating spatula.
Once the resin is applied, the floor will be completely cured in approximately 24 hours, depending on temperature.
Tip: mix the epoxy carefully, carefully scraping the sides and bottom of the mixing cup or bucket. After mixing, pour into another bucket and mix again to make sure all the epoxy is mixed well.
Step 4: Enjoy your awesome penny floor!
You have now made your own coin floor! It literally costs you pennies, but then you have something stunning. This penny floor will of course attract attention when you have visitors and will undoubtedly also do well on Instagram. If you still have questions after reading this article, feel free to send us a chat message!