A leaking boat window is one of the most persistent annoyances a boat can have. It causes moisture spots and mold, and over time even compromises the structure of your boat. Fortunately, replacing or resealing boat windows is a job you can easily do yourself, provided you use the right materials and work meticulously.
Because every boat and window is different, this step-by-step article explains how to proceed using professional products from Sika. Whether you have a wooden, steel, or fiberglass boat, and whether your window is made of glass or plastic: with this guide, you are guaranteed to stay dry!
1. The basics: which substrate and window do you have?
Before grabbing the sealant gun, you need to know which materials you are working with. Sika has developed a specific system for every combination. Choosing the wrong sealant or primer is the number one cause of leaks.
The material of the window
- Plexiglas (PMMA) & Lexan (polycarbonate)
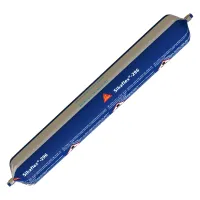
Plastic windows are lightweight, but beware: plastic expands up to four times more than metal or fiberglass under the influence of heat. This requires a sealant with high elasticity and UV resistance: Sikaflex 295 UV. - Tempered or laminated glass
Real glass is heavy and rigid. For this, use the extremely strong, structural glass adhesive Sikaflex 296.
The substrate of the boat
- Fiberglass (GRP)
Must be thoroughly cleaned and roughened to achieve a chemical bond. - Aluminum & steel
Requires a primer that prevents corrosion and ensures the sealant does not release from the smooth metal. - Wood
A porous substrate that must be sealed completely, so that oils or juices from the wood do not affect the sealant joint.
2. Installation style: flush or surface-mounted?
How the window is installed determines how you apply and finish the sealant.
| Installation method | Description | Advantage | Key point to consider |
| Surface-mounted |
The window overlaps the opening and rests on the hull surface. |
Easy to install, larger bonding surface area. | The sealant line is fully exposed to the sun; UV protection (primers) is crucial. |
| Flush-mounted |
The window is recessed and fits flush with the hull surface. |
Sleek, modern flat look. Less wind resistance. | Sealant thickness is precise to absorb movement in the corners. |
3. The right Sika activator and primer
Ask a professional why a sealant joint fails, and the answer is almost always: "poor degreasing or no primer used." Sealant alone is not enough. Plastic releases quickly without a primer, and UV radiation can silently degrade the sealant layer behind glass.
Sika therefore uses a smart system of activators (for cleaning and activation) and primers (for ultimate adhesion and UV protection):
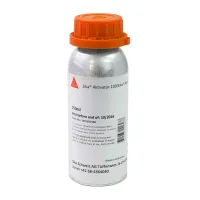
- Sika Aktivator 205
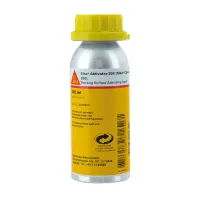
An alcohol solution with an adhesion-promoting agent. Ideal for cleaning and activating non-porous substrates, such as metals, plastics, and glazed surfaces. - Sika Aktivator 100
Specially developed for pre-treating real glass (always use in combination with Sikaflex 296). - Sika Primer 209 D
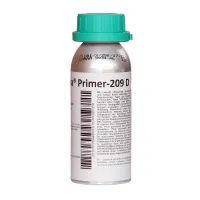
The essential primer for plastic windows (Plexiglas and Lexan). Also prevents 'crazing' (micro-cracks in the plastic). - Sika Primer 206 G+P
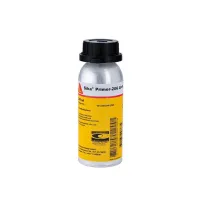
The black primer used on the boat side (such as fiberglass, aluminum, and steel) én on real glass to create an impenetrable UV protective barrier.
Handy selection chart: what do you need?
| Window material | Boat material | Which sealant? | Window pre-treatment | Boat pre-treatment |
| Plastic (Plexiglas/Lexan) |
Fiberglass |
Sikaflex 295 UV | Degrease + Primer 209 D | Aktivator 205 + Primer 206 G+P |
|
Steel |
Aktivator 205 + Primer 206 G+P | |||
|
Aluminum |
Aktivator 205 + Primer 206 G+P | |||
|
Wood |
Primer 290 DC | |||
| Glass |
Fiberglass |
Sikaflex 296 | Aktivator 100 + Primer 206 G+P | Aktivator 205 + Primer 206 G+P |
|
Steel |
Aktivator 205 + Primer 206 G+P | |||
|
Aluminum |
Aktivator 205 + Primer 206 G+P | |||
|
Wood |
Primer 290 DC |
4. Why you should never screw boat windows down
On older boats, you often see windows secured all around with dozens of screws or bolts. Although this feels extra secure, screwing down (especially plastic) windows is strictly discouraged today. Modern marine sealants from Sika are structural adhesives; they hold the window effortlessly without mechanical fasteners.
Using screws actually creates the following risks:
- Tension and uneven flexing
A screw pulls the window extremely tight against the boat locally. This creates a wavy effect (uneven flexing) in the window. The sealant layer becomes squeezed too thin under the screw while remaining thicker in between. This is a guarantee for leaks. - Cracking around screw holes
Materials like fiberglass and Plexiglas/Lexan expand and contract significantly with temperature changes. If the window tries to expand while clamped by a rigid screw, massive tension builds up. As a result, the plastic irrevocably cracks around the screw holes (stress cracking). - The sealant cannot move
A sealant joint can only maintain its flexibility and movement capability if the window has space to move microscopically. A screw completely blocks this movement, overloading and releasing the joint right next to the screw. - Extra leak paths
Every screw drilled through the hull represents a potential new water leak path once the sealant around the screw gives way to tension after a few years.
5. Why sealant thickness is the key to success (and how to guarantee it)
A common mistake is screwing or clamping the window as tightly as possible against the boat until nearly all sealant is squeezed out. The result is an ultra-thin sealant layer. As soon as the window expands and contracts due to temperature fluctuations, the sealant shears right off.
The sealant layer requires a minimum thickness (usually between 4 and 6 mm) to absorb this movement.
How do you guarantee this sealant thickness when pressing?
Pressing the window down manually or with clamps can easily squeeze out too much sealant. Use one of these smart methods instead:
- Neoprene / EPDM rubber pads (spacers)
Cut small rubber blocks to the correct thickness (e.g., 4 or 5 mm) and space them along the rebate or joint line. Press the window firmly against them. The blocks stay permanently embedded and get completely encapsulated by the sealant later. - Sika Spacer Tape (foam tape)
Apply a firm, double-sided foam tape of the correct thickness along the edge. This guarantees the exact distance along the entire length én holds the window in place while the sealant cures. - The 'two-step method'
Apply sealant and press the window hand-tight to the desired thickness (use temporary wooden spacers on the outside). Let the sealant cure for 24 hours until rubbery, then clamp the window down permanently. The semi-cured sealant acts as its own flexible spacer!
6. Step-by-step application: clean, sharp, and dry
Now that you know the theory, let's get to work. Follow these steps for a professional and clean result.
Step 1: Dry fitting and masking
Place the window in position 'dry' first and trace the outline using high-quality painter's tape (preferably gold masking tape). Carefully mask both the boat (just outside the window) and the window itself (just inside the joint line). This saves hours of cleanup afterwards!
Step 2: Cleaning, sanding, and activating
Lightly sand the bonding surfaces using a fine abrasive pad and ensure the area is lint- and dust-free. Apply the correct Sika Aktivator (205 or 100) with a clean, lint-free cloth or tissue and immediately wipe dry with a clean cloth (the 'wipe-on, wipe-off' method). Allow 10 to 15 minutes to flash off.
Step 3: Applying primer
Apply the specified primer (Sika Primer 209 D or Sika Primer 206 G+P) in a single thin, uniform layer using a brush or felt applicator. Pay attention to drying time: the primer must be completely dry (usually approx. 30 minutes) before applying sealant.
Step 4: Applying sealant and placing spacers
Apply Sikaflex sealant in an even, triangular bead (cut the nozzle of the cartridge in a V-shape). Ensure sufficient sealant is applied so no air pockets form. Then place your neoprene pads or spacers.
Step 5: Placing the window and smoothing
Gently and evenly press the window down until it touches the spacers. Spray the excess squeezed-out sealant with Sika Tooling Agent (or a mild, neutral soapy solution without lemon) and smooth the joint in one fluid motion with a spatula.
Step 6: Removing tape
Remove masking tape immediately after smoothing the sealant, so while the sealant is still wet! If you wait until the sealant dries, you will tear the edges of your new joint and have to start over.
Need more information on sealing boat windows?
All required products for sealing boat windows can be found at Polyestershoppen. Order before 5:00 PM and we will ship your order the very same day.
Need extra guidance? Feel free to contact our specialists. We are happy to advise you on the right products and help you calculate the correct sealant thickness.