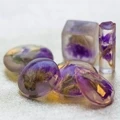
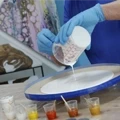
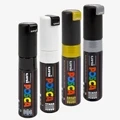
Making your own jewelry, how fun is that! In this article, we explain step by step how to make your own epoxy jewelry using our jewelry starter kit. Do you have any specific questions? Feel free to contact us. We are happy to help!
What do you need to make epoxy jewelry?
When making epoxy jewelry, it is important to have the right products at home. We have listed the most essential items for you. Did you know that we have put together a complete jewelry package so you can get all the necessary products delivered at once? In this article, we use the products from the epoxy jewelry package. This package is super handy to use, but you can also assemble your own kit.
Jewelry package contents
- RESION UV Resin Art epoxy LV (150 grams)
- RESION MetalTint (mica powder)
- 12-piece jewelry mold set
- Square bead silicone mold
- Teardrop pendant mold
- Plastic pipette
- Nitrile gloves
- Mixing cups
These products are recommended for use when working with epoxy:
- Scale
- Mini gas torch or Bubble Burst (recommended)
How to make epoxy jewelry?
Step 1. Preparation
Always make sure you wear nitrile gloves and old clothes when working with epoxy, as epoxy should not come into contact with your skin. A mask is not mandatory, but do ensure that the room you work in is well ventilated. Have questions about the right personal protective equipment? Read our article: “Working safely with epoxy”
Step 2. Mixing epoxy
Mix the required amount of epoxy in a mixing cup; the mixing ratio for this epoxy is 100:50. Ensure it is weighed accurately using a digital scale and stir for 2 minutes with a mixing spatula. The working time is 30 minutes at a temperature of 20°C. Make sure to pour your mixed epoxy into the mold within this timeframe. The optimal temperature for processing epoxy is 18°C or higher. We recommend using RESION UV Resin Art epoxy LV for jewelry making, as it is the best epoxy for jewelry.
Step 3. Adding pigment
Once the epoxy is mixed, add various Resin Art pigments to the epoxy as desired. Stir well again to combine. Adding pigment is optional, of course. It is also possible to keep your epoxy jewelry completely clear and transparent.
Step 4. Pouring epoxy
Now it's time to pour the epoxy into the mold! Since jewelry items are often small, it is handy to use a pipette to draw the epoxy from the mixing cup and fill the mold. Fill the mold until it's almost overflowing for the neatest finish.
Remove air bubbles using RESION Bubble Burst or a mini gas torch. When using a torch, be careful not to hold it over the mold for too long to avoid damaging the silicone. Bubble Burst (alcohol spray) is the safest way to remove micro-bubbles from epoxy.
Step 5. Curing
Once you have filled the mold, the waiting begins! The epoxy will now cure. After about 12 to 18 hours, you can demold the jewelry pieces. Note: the epoxy is fully cured only after 3 to 5 days. Once your jewelry pieces are fully cured, finish them as desired, for example by polishing or doming (pouring a fresh layer of clear epoxy over the top of the jewelry item).
We hope everything is clear. If you have any questions, you can always reach out to our specialists! Ask your questions via support@polyestershoppen.com.