You may have seen it passing by: dried flowers encased in a transparent layer of epoxy. Gorgeous! We therefore regularly get questions about how to cast these flowers in epoxy. In this article, we describe step by step how you can easily make these epoxy flowers yourself.
In the video below, Leen shows how to cast flowers in epoxy very easily:
Step 1: Drying the flowers
If you are going to cast flowers in epoxy, it is very important that the flowers are thoroughly dry; epoxy and moisture do not mix well. You can use dried flowers, but you can also choose to dry the flowers you want to cast yourself. You can do this using chinchilla sand, which you can buy at pet shops. Once the flowers have dried properly, you can move on to making the epoxy!
Step 2: Making UV Epoxy
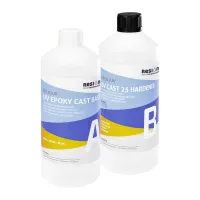
In this step, we are going to prepare the epoxy. We recommend using RESION UV Resin Art Epoxy (LV). This is a high quality epoxy resin that is highly resistant to UV light. So the use of UV stabiliser is not necessary and the epoxy does not yellow! In addition, the epoxy is very clear and easy to process due to the 2 to 1 mixing ratio, making it ideal for casting flowers in epoxy! Making RESION UV Resin Art Epoxy goes as follows: to start with, put on the nitrile gloves. Weigh component A (base) and component B (hardener) accurately according to the mixing ratio on the packaging (2:1 by weight). Mix both components gently for 3 minutes. Remember to scrape along the edges and bottom of the mixing cup.
Tip: to achieve a good result, it is very important to handle the mixing ratio accurately. Therefore, always weigh with a scale and make sure you mix the epoxy correctly.
Step 3: Casting the flowers in epoxy
After you have prepared the epoxy, we are going to pour the flower into epoxy. First, pour a small layer of epoxy into the mould and hang the flower in there. In the video, Leen has pressed the stem of the flower through a mixing spatula to keep the flower in place. After the first layer has been poured, you can fill the rest of the mould to the brim with epoxy. Then let the epoxy cure for at least 24 hours.
Final result
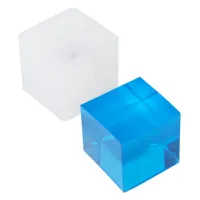
After the epoxy has hardened, you can carefully remove the result from the mould. The result may be a little dull in some places. In this case, you can polish the cube to bring back the shine. You have now cast your flower in epoxy! And are you happy with the result? Do you have any questions about flowers cast in epoxy or would you like to share photos of your works with us? If so, feel free to contact our customer service team!
Are you creative and looking for a super fun hobby? Then Resin Art (epoxy art) is really for you! You can use epoxy to make beautiful jewellery, coasters, (rive…
More information
Bring positive energy into your home by making your own orgonite! With Polyestershoppen's products, you can easily make this beautiful decoration yourself. Want…
More information
In this article, we will explain how you can very easily make your own Resin Art clock. You will need RESION UV Epoxy Resin and various Resin Art pigments. Espe…
More information
Are you creative and do you want to make something unique? Then make the most beautiful epoxy coasters yourself. Making epoxy coasters is not difficult at all.…
More information
A work of art, table or anything else you made out of epoxy resin, may get scratched over time. Epoxy resin scratches quite easilly, this is not a bad thin…
More information
You may have seen it passing by: dried flowers encased in a transparent layer of epoxy. Gorgeous! We therefore regularly get questions about how to cast these f…
More information
RESION UV Resin Art Epoxy! This epoxy is available in our webshop. RESION UV Resin Art Epoxy is specially developed for creative Resin Art artists. In this arti…
More information
You see it a lot these days: beautiful paintings, tables, coasters, bowls or other resin art creations with a 'beach look' (beach + wavy water). This super cool…
More information
Are you familiar with our Piñata Alcohol Ink pigments yet? In this article you will read all about these wonderful pigments. We'll tell you what Pi&ntild…
More information
We can imagine you could use some tips when you are just starting out with epoxy. After all, working with this material involves much more than simply mixing tw…
More information
Are you wondering how you can beautifully finish the edges of your Resin Art creations? Then use Uni Posca paint markers. In this article you can read what thes…
More information
Do you want to pick up making Resin Art but have no idea where to start or what to buy? Then this beginner's guide to Resin Art is exactly what you are looking…
More information
Making your own jewellery is so much fun! But where do you start? What's the best epoxy resin for making jewellery? In this article, we explain step-by-step how…
More information
Air bubbles, a common problem you run into while pouring epoxy. There are several ways to remove air bubbles and you can read about them in this article. If you…
More information
Amine blush is a common problem when working with epoxy resin, but what exactly is it and how can you prevent it? In this article, we explain all about amine bl…
More information
Do you have a question about this article?
Do you have a specific question? Call one of our specialists for free advice
+3185 0220090