There are many creative ways to make beautiful tables with epoxy resin. Epoxy casting on (wooden) tables has increased enormously in recent years because it is relatively easy to do. Tables can be covered with a thin epoxy coating, purely for protection, but also with a thicker layer of epoxy to achieve a 3D effect.
Tables can also contain various objects, which are surrounded by epoxy. Think of sweets (Smarties, wine gums, jelly beans) but also things like picks, beer caps, coins, banknotes, sand and shells and much more. To experience what's involved, we created a table ourselves in which we processed Smarties. Below we explain all the steps we took.
Below we explain all the steps we went through.
Raw materials required:
Tools required:
Protective materials required:
Before you can pour objects into a table, you first need to determine the materials you'll be using. In our case, we chose an MDF top which we bevelled using a circular saw. This will later give an interesting effect with the Smarties processed in the table. In principle, you can make a top from any type of wood (underlay, plywood, concrete plywood and even OSB).
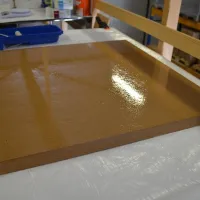
To prevent air escaping from the wood during casting, we first 'prime' the wood. This seals the structure of the wood and prevents the epoxy from forming air bubbles, which cannot be eliminated after casting. Priming can be done with epoxy moulding resin. Is the wood very well finished? Then use a special epoxy primer for smooth substrates to ensure that the primer adheres well to the wood.
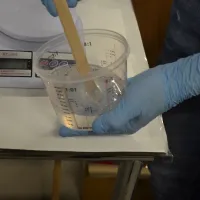
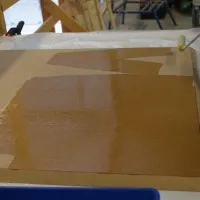
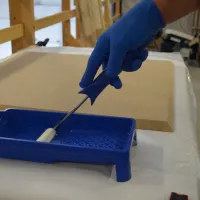
Prepare approximately 300 to 400 grams of epoxy per square metre. Weigh the two parts and mix the epoxy using the two-cup mixing method. Apply the epoxy to the wood with a velour roller. A thin coat that covers the entire surface is sufficient.


Because you're going to cast epoxy resin onto the table, it's important to make sure that the resin doesn't leak out. We do this by making a "formwork" around the tabletop. You can use various materials to make a formwork, such as plastic corner profiles or wooden slats in our case. It's important to make sure that the epoxy doesn't stick to it. This can be avoided by covering the formwork with packing tape, as the epoxy will not adhere to it.


Use packing tape to fasten the corner profiles together. One advantage is that the epoxy will not adhere to it and the tape can be easily removed.
To prevent the objects you are going to make from moving too much, it is important to glue them first. Make sure that the layer of epoxy applied as a primer is well sanded to 120 grit. This will ensure optimum adhesion with the next coat of epoxy. Clean the blade with acetone after sanding.
You can pour all sorts of objects. For example, your favourite photos, corks, beer caps or euro coins. In our case, we poured smarties on the table for a fun, colourful effect. Because the smarties are completely sealed against oxygen by the epoxy, they won't perish.
Prepare around 300 grams of epoxy powder per square metre and roll it onto the wood with a velour roller. Make sure you spread it evenly over the sheet. Allow the epoxy to cure for at least 10 hours.


Ideally, you should apply a first coat of epoxy resin within 24 hours. Make enough epoxy to fill the objects completely. This depends on the height of the object. If necessary, add a UV absorber to the epoxy. This is particularly recommended if the table is often exposed to sunlight. In this case, the UV absorber will stop the yellowing as much as possible. You can pour about 2-3 cm at a time. If the objects are heat-sensitive (such as our Smarties), pour no more than 1 cm thick per layer. You can pour several layers without any problems.
Once you've made the epoxy, spread it over the entire sheet and spread it evenly using a laminating spatula. Start ventilating the resin after 10-15 minutes. Do this using the gas burner. As you float gently over the blade with the burner, you will see air bubbles in the resin rise to the surface and the resin will flow flat. Don't burn for too long in one place to overheat the resin. After purging, wait 5 to 10 minutes and check again for air bubbles in the resin. If so, purge it again with the burner.


Once the epoxy resin has fully cured, the table is almost ready. Any drips/bubbles on the underside of the table can be sanded down or cut off or with a sharp knife. After that, it's time to enjoy your unique table.


Here you can find all 9 related articles on this topic. Mis je informatie om aan de slag te gaan met jouw klus? Neem dan contact met ons op.
Do you have a specific question? Call one of our specialists for free advice +3185 0220090
