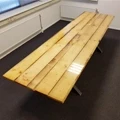
Applying an epoxy coating to wood provides a beautiful high-gloss appearance. Small gaps and cracks are filled, and the wood is protected against moisture penetration and dirt. Ideally, all sides of the wood and any screw holes should also be treated. This is especially true when moisture is a factor, such as with countertops or outdoor tables. Wooden boats (or their components) and wooden interior boat paneling are also best treated all around. Want to apply epoxy to wood? Follow these steps:
- Step 1. Sanding the wood.
- Step 2. Taping off gaps/cracks.
- Step 3. Applying the first coat of epoxy.
- Step 4. Sanding.
- Step 5. Applying the second coat of epoxy.
- Step 6. Finishing with DD Paint.
Below you will find the required supplies for applying an epoxy coating to a tabletop:
Requirements
To treat a wooden tabletop with epoxy, you will need the following materials:
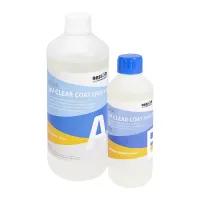
- RESION UV Clear Coat epoxy coating (coverage: approx. 200-300 g/m2)
- Sandpaper (180 grit)
- Masking tape
- 1300 ml Mixing cups
- Velour rollers or epoxy roller (recommended)
- Roller frame
- Nitrile disposable gloves
- Mixing spatulas
- Weighing scale
- Acetone
Finishing with DD Paint
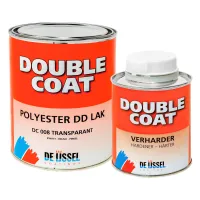
- Double Coat DD Paint
- Sandpaper 240 and 320 grit
- DD Paint accessory kit
Step 1. Sand the wood
Sand the wood to remove loose fibers and sharp edges, making it easy to apply the epoxy evenly to the wood. Use 180-grit sandpaper for this step. Thoroughly clean the surface with acetone after sanding.
Step 2. Taping off gaps and cracks
Tape off knots or cracks on the underside of the table using packaging tape. Epoxy does not adhere to this tape, so it can be easily removed later. Any excess cured epoxy can be easily sanded away.
Step 3. Applying the epoxy coating (1st coat)
Follow the steps below to easily mix the transparent epoxy coating (UV Clear Coat):
- Accurately weigh the epoxy base (A) and hardener (B) according to the correct mixing ratio (100:50). This is a crucial step, so using a scale is highly recommended.
- Mix both components thoroughly for about 3 minutes, scraping the sides and bottom of the mixing cup.
- Pour the mixed resin into a new mixing cup and mix again to ensure complete homogenization.
- Apply approximately 300 grams of epoxy per m2 using a specialized epoxy roller or velour roller. Start with the end-grain edges and then roll epoxy over the entire surface.
- Allow the epoxy to cure for at least 24 hours.
Step 4. Sanding the epoxy layer
Sand the cured epoxy layer using 180-grit sandpaper. The surface will turn dull, but this dullness will disappear once the next coat of epoxy is applied.
Step 5. Applying the epoxy coating (2nd coat)
Clean the wood again before applying a new coat of transparent epoxy coating. Now apply approximately 250 grams of epoxy per square meter.
Then let the epoxy cure for 6–12 hours until it is just barely tacky, and apply another layer of 250 g/m2 epoxy. This builds up sufficient layer thickness for good protection and a great finish. Allow the final layer to cure for a few days.
Step 6. Finishing with DD Paint
Treated a wooden tabletop with epoxy? We recommend always topcoating it with at least two coats of transparent Double Coat DD Paint. This 2-component topcoat protects the epoxy against scratches and yellowing. Especially for outdoor applications such as boats, garden tables, outdoor furniture, shutters, or doors, we strongly advise not skipping this step. DD Paint is available in high gloss, matt, or semi-gloss.
- Sand the epoxy table using 240-grit sandpaper.
- Mix the base and hardener in the correct ratio (67:33).
- Allow the mixture to pre-react for 30 minutes, then add 3–5% IJmopox brush thinner.
- Apply a coat of DD Paint evenly using a foam roller.
- Let the paint cure for 24 hours and apply a second coat without sanding (if you wait longer, you must sand the surface with 320-grit sandpaper).
- Now let the table cure completely.
Need more information about applying epoxy to wood?
In the article above, you learned how to apply epoxy to wood. Still have questions about the products or procedure? Feel free to contact our specialists! They are happy to answer your questions via email, phone, or live chat.