Preparing wooden floors for epoxy flooring

Contrary to popular belief, wooden floors can also be covered with an epoxy coating or with poured epoxy flooring. Follow the steps below to make a wood floor that is suitable for epoxy coating. In addition, it is also possible to apply an epoxy screed to a wooden floor. However, this is not immediately the case.

Follow the steps below to make a wooden floor that is suitable for epoxy coating or for pouring an epoxy screed.

For this job you will need:

Additional supplies if you want to waterproof the floor:

Step 1. Repair the floor if necessary

Rotten planks and beams must first be repaired or replaced. This happens quite often when a bathroom is replaced. Old bathrooms can leak, causing wood rot. So check the beams and planks carefully.

Stap 2. Apply underlayment 

Screw a 12 mm thick sheet of underlayment onto the planks. Use a screw every 15 cm for this. Stagger the seams as much as possible. Leave the underlayment approx. 0.5 cm free at the edges if the floor is in a damp room. Then apply a second layer of underlayment, staggering the seams at least 30 cm from the underlay. Screw these plates again every 15 cm.

Alternatively, the plank floor can sometimes also be removed. Then screw 2 underlayment plates of 15 mm or 18 mm thickness onto the beams.

Step 3. Apply epoxy floor primer to the underlayment

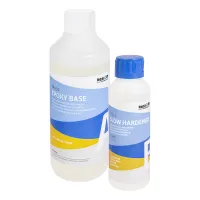
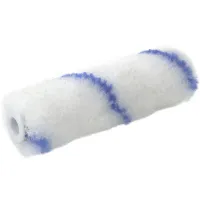
A layer of epoxy floor primer for dry surfaces can now be applied to the underlayment. Add the hardener to the base component and mix very well to a homogeneous mixture. Also frequently scrape the bottom and walls of the mixing cup or bucket to prevent mixing errors. Apply the primer with a fleece roller. Count on approximately 250 gr/m2 consumption.                                                                         

Do you want to turn the floor into a waterproof container for the bathroom, for example? Then also apply primer to the bottom 10 cm of the walls.

Now let the primer harden. At room temperature, 20 hours is sufficient. Curing takes longer at lower temperatures.

Step 4. Sand the primer 

The underlayment will now feel rough. The wood fiber is somewhat swollen, which makes the surface rough. Sand the floor with 120 grit sandpaper until it is smooth. With a 150 mm rotary sander this will take approximately 2 minutes per square meter. If 70-80% of the surface is dull, it has been sanded sufficiently.

The floor is now ready to be coated with epoxy floor coating or to be provided with an epoxy cast floor. If you want to finish the whole thing without a skirting board, it is now time to fill the seam between the floor and wall with Tec 7 adhesive sealant.

Step 5. Round the edges

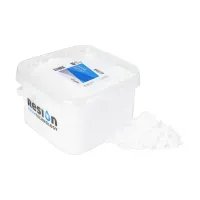
If you want to provide the floor with an extra waterproof layer that also runs up the wall, you now need to fill the edges with a mixture of epoxy and the filler Stewathix. This rounds off the sharp corners so that the glass fabric can make the bend from floor to wall without difficulty.

Now mix universal epoxy with fast hardener in the correct mixing ratio using a scale. You need approximately 150 grams of epoxy per meter of edge. Add Stewathix to turn the epoxy resin into a paste.

Work this paste in the corner between the wall and the floor and finish it neatly with a rounded stirrer, an old spoon or something similar. Remove excess epoxy with a putty knife. Allow this mixture to harden for at least 14 to 20 hours before proceeding.

Step 6. Apply glass tissue

Now cut glass fabric 200 gr/m2 roughly to size on the floor. Make sure that the glass fabric is neatly laid out. To laminate the glass fabric, you can use universal epoxy. For large surfaces of more than 10 square meters it is advisable to use an epoxy with a slow hardener due to the processing time. For smaller surfaces, an epoxy with fast hardener is sufficient. During laminating, it is advisable to prepare epoxy several times to ensure sufficient processing time. 

Pour some epoxy mixture onto the glass fabric and spread it with a velour roller. Then apply some more epoxy to another spot. Impregnate all the glass fabric with epoxy in this way. The epoxy can be applied to the walls with a velor roller. Immediately after impregnation, thoroughly deaerate the glass fabric with a bleed roller. Roll it over the glass fabric with some force to remove air bubbles. Place a new layer of glass fabric flush against the previous layer and impregnate again with resin. Finish the entire floor and the edges in this way.

Step 7. Curing and follow-up

Allow the epoxy to harden at room temperature for approximately 20 to 24 hours. Curing takes longer at lower temperatures. After the epoxy has hardened, go over the glass fabric with sandpaper to smooth down any raised fibers or to sand an overlapping piece of glass fabric flat.

The floor is now ready to finish with an epoxy floor coating or cast floor. You can also provide the floor with tiles. Use a cement-based tile adhesive if you want to glue these tiles.

Product advisor
  • Expert advice
  • Superfast delivery with PostNL
  • Pay after delivery

Products used in this article

Product 1 of the 15

Request a step-by-step plan

Request a tailor-made step-by-step plan now! As soon as we have received the information below, we will tell you exactly what you need. Then you can immediately start laying the perfect floor.

How can we help you?

  • 1 We receive your request
  • 2 We make a custom plan and discuss it with you
  • 3 Within a few days you will have all the materials at home
  • 4 We help you step by step with all your questions about your floor

All about installing or repairing epoxy floors

Here you can find all 17 related articles on this topic. Mis je informatie om aan de slag te gaan met jouw klus? Neem dan contact met ons op.

Repairing an epoxy gravel (granular) floor Repairing an epoxy gravel (granular) floor
Decorative gravel floors can become damaged over the years. Pieces may come loose or a piece of flooring may need to be repaired. Epoxy gravel floors then offer… More information
Priming concrete and cement floors with epoxy Priming concrete and cement floors with epoxy
A correct surface is very important for a perfect finish of a floor with epoxy or polyurethane. By treating the surface correctly, you ensure that the surface i… More information
Applying epoxy floor coating [manual] Applying epoxy floor coating [manual]
With this manual, you can easily apply an epoxy floor coating yourself. One of the advantages of epoxy is that the product is easy to process and resists heavy… More information
Pre-treating tile floor for epoxy floor coating Pre-treating tile floor for epoxy floor coating
Is it possible to apply an epoxy floor coating over a tiled floor? This is a question we are regularly asked. The answer to this is: yes, it is certainly possib… More information
Preparing wooden floors for epoxy flooring Preparing wooden floors for epoxy flooring
Contrary to popular belief, wooden floors can also be covered with an epoxy coating or with poured epoxy flooring. Follow the steps below to make a wood floor t… More information
Repairing holes and cracks in cement/concrete floors Repairing holes and cracks in cement/concrete floors
You can easily repair concrete with epoxy yourself. Concrete floors can be damaged, which can make it difficult to apply an epoxy coating or cast floor or will… More information
Priming basement floors and walls Priming basement floors and walls
Basements and cellars are often somewhat stuffy and damp spaces. This is often because the floor and walls allow moisture to penetrate. To give the floor and wa… More information
Leveling a concrete floor with epoxy Leveling a concrete floor with epoxy
In some cases it may be necessary to level a concrete floor with leveling epoxy before applying a floor coating or an epoxy cast floor. Concrete floors with a c… More information
Matt floor coating for epoxy cast floors [manual] Matt floor coating for epoxy cast floors [manual]
In this article, we will explain how to apply a matt-gloss coating to an epoxy floor. This is an easy-to-apply product with good properties. For example, the… More information
Epoxy flooring over tiles in the bathroom Epoxy flooring over tiles in the bathroom
Do you no longer like the tiled floor in your bathroom or worse: do you have leaks along the joints? Then an epoxy floor offers an excellent and modern solution… More information
Sleek epoxy residential floor by CreaChick Sleek epoxy residential floor by CreaChick
CreaChick and CreaRick, known from Youtube, took up the challenge and created a super nice epoxy floor in their studio. There was a lot involved, as tiles als… More information
Commercial space with an epoxy floor Commercial space with an epoxy floor
Are you moving to a new commercial building and do you want a rock-solid cast floor in the office right away? Stop searching, Polyestershoppen is the specialist… More information
Installing a sleek epoxy garage floor Installing a sleek epoxy garage floor
Are you completely fed up with that dirty concrete floor in your garage? Are you constantly bothered by dust? Or do you want to use your garage as a utility r… More information
What is the difference between an epoxy screed and epoxy floor coating? What is the difference between an epoxy screed and epoxy floor coating?
We are regularly asked what the difference is between epoxy floor coating and epoxy cast flooring. And what the difference is in price. In this article, we will… More information
5 benefits of an epoxy cast floor 5 benefits of an epoxy cast floor
It is wildly popular: a sleek epoxy cast floor in homes, sheds, garages and office buildings. At Polyestershoppen, you will find all the products you need to la… More information
Do you want to install an epoxy cast floor yourself? Read our manual Do you want to install an epoxy cast floor yourself? Read our manual
Do you want to install an epoxy cast floor yourself? With the help of this manual, we will explain to you in detail how to apply an epoxy cast floor yourself! O… More information

Do you have a question?

Do you have a specific question? Call one of our specialists for free advice +3185 0220090