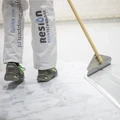
Do you no longer like the tiled floor in your bathroom or worse: do you have leaks along the joints? Then an epoxy floor offers an excellent and modern solution.
One of the advantages of epoxy flooring in your bathroom is that its completely liquid-tight and has a very modern look. Moreover, an epoxy floor is also suitable for underfloor heating.
Benefits of epoxy flooring over bathroom tiles:
- Completely seamless.
- Waterproof.
- Modern, sleek look.
- Very easy to clean.
- Maintenance free.
- Suitable for underfloor heating.
- Easy to do yourself.
Applying an epoxy flooring over tiles
Do you want to apply an epoxy floor in your bathroom and do you currently have a tiled floor? We are happy to help you with this step-by-step plan.
Step 1. Provide a good surface
Because you still have tiles in your bathroom and you want to work over them, good preparation is important. Good preparation promotes the adhesion of the epoxy to the tiles.
It is very important that you clean the tiles properly. Often there is a lot of skin grease on the tiles. That is why it is important to use, for example, acetone to degrease the bathroom floor. Repeat this a few times before you start applying resin over tiles.
You can roughen the tiles by sanding them very coarsely with grit 40.
Step 2. Applying the correct primer
Tools and supplies:
- Epoxy primer for smooth surfaces (150-200 gr/m2)
- Fur roller 18 cm
- Spiral mixer
- Nitrile gloves
- Flat brush 50 mm
Make sure the entire bathroom floor is empty, clean and dry. For adhesion on smooth tiles, we have a special epoxy primer. This special epoxy primer ensures better adhesion of epoxy to smooth tiles.
Make approximately 150 to 200 grams of epoxy primer per square metre. Pour the hardener into the tin and mix well with a spiral mixer. Scrape well along the edges and bottom of the tin to make sure everything is mixed well. Then pour the primer over the edges of the floor and spread the primer with an 18 cm coat roller. Bathroom edges can be done with a wide flat brush. After application, let the primer cure for at least 24 hours before moving to the next step.
Step 3. Applying levelling epoxy
Requirements:
- Levelling epoxy (approx. 1.5 kg/m2)
- Flat trowel
- Spiral mixer
- Mortar tub or large bucket
- Nitrile gloves
- Floor squeegee + stick
- Spiked soles (recommended for surfaces larger than 8m2)
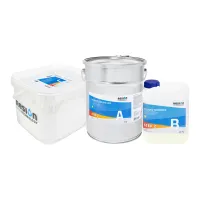
To ensure the bathroom floor is seamless and looks like a cast floor, it is important to level it. This can easily be done with levelling epoxy. Thus, you will have excellent adhesion with the primer if you do this within 48 hours of applying the primer.
The amount of levelling epoxy required is difficult to estimate. We therefore recommend ordering a sufficient amount of levelling epoxy. In any case, count on approximately 1.5 kg per square metre.
Make 8, 20 or 40 kg of epoxy levelling compound at once. First mix the epoxy in the mortar tub by pouring both the resin and hardener completely into the tub. Mix both components well with a spiral mixer, scraping well along the edges and bottom. After this, add all the powder. We recommend doing this with someone else. Mix the powder with the spiral mixer for at least 3 minutes, until it is a nice homogeneous mass.
Now that your levelling epoxy is ready to use, you can pour it on the bathroom floor. Spread it with a floor squeegee if necessary. You can use the trowel to spread the epoxy evenly. If necessary, make new levelling epoxy in between and continue working. Then let the levelling epoxy harden for at least 24 hours.
Step 4. Applying epoxy floor coating
Tools and supplies:
- Floor coating (approx. 700-800gr/m2)
- 1x fur roller 18 cm + roller holder + extension rod
- Flat disposable brush 50mm
- Nitrile gloves
- Spiral mixer
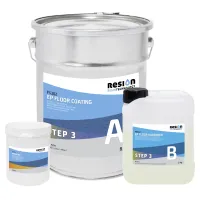
It is now time to finish the bathroom floor with epoxy floor coating. Within 48 hours of applying the levelling, you do not need to sand and can apply the floor coating directly. Otherwise, sand with 80-grit paper for optimal adhesion.
Count on around 700 to 800 grams of epoxy floor coating per square metre of bathroom. Because our system is solvent-free, nothing evaporates, so you get a good layer thickness right away. For this reason, applying one layer is sufficient.
Pour the hardener provided into the tin of floor coating base and add the pigment. Scrape out the pigment with a mixing spatula.
Then mix everything well with a spiral mixer on a cordless drill. Do this on a low speed and scrape well along the bottom and edges. Mix for at least 5 minutes until it is a homogeneous mass.
Immediately after mixing, pour the floor coating over the floor along the edges. Spread the floor coating with a coat roller. Finish the edges with a 50 mm disposable brush.
Roll the floor coating crosswise. Make new floor coating in between if necessary.
Step 5. Anti-slip with rubber granules
You can give the floor a nice anti-slip profile immediately after the floor coating has been applied. Especially in the shower area of a bathroom, this is recommended.
Advantages of Soft Sand rubber anti-slip granules for bathrooms:
- Easy application.
- Because the sand is made of rubber it is nice to walk on (not too rough).
- Very good anti-slip properties.
Tools and supplies:
For a nice anti-slip floor, it is advisable to sprinkle the granules. This is an easy job with the grit pack supplied. Sprinkle the granules liberally over the floor when it is still wet. Sprinkle the granules with a throwing motion. Work from back to front and wear studded soles.
Now let the floor coating cure for at least 48 to 72 hours. After that, you can vacuum away the loose granules. This will leave a nice profile.
Step 6. Matt gloss coating
Another option is to finish the floor with a matt gloss finish using a PU coating for epoxy floors. Of course, you can also combine this by, for example, fitting the shower cubicle with rubber anti-slip granules and finishing the bathroom floor.
Benefits of PU matt gloss coating:
- For a beautiful matt gloss finish.
- Gives slight anti-slip properties.
- Better protection against scratches.
Tools and supplies:
- Matt gloss PU coating (approx. 100gr/m2)
- Velour paint roller 18 cm + roller holder + extension rod
- Large paint tray
- Spiral mixer
- Empty bucket (5 litres)
- Nitrile gloves
- Paint sieve
First sand the floor with 180 or 240-grit paper, using a rotary sander. Then clean the bathroom floor thoroughly and make sure all the dust is gone. Do not proceed until the floor is completely dry again.
It is then time to start mixing the PU coating. Pour the base into a clean empty bucket and then pour in all the hardener. Mix both components with a spiral mixer at low speed for a long time. Scrape well along the bottom and edges. Mix for at least 3 minutes.
Then pour a small amount through the paint strainer into the large paint tray. The paint strainer ensures that no flakes end up in the coating you are about to apply.
Now roll thin layers of coating over the floor. Work systematically because you can't always see exactly where you left off. Roll over crosswise.
After about 4 to 6 hours you will already see the beautiful matt-gloss effect, but it is advisable not to carefully walk on the floor in socks, for example, until after 24 hours.
Everything for your epoxy bathroom floor at Polyestershoppen
All the products you need to lay an epoxy floor over tiles in your bathroom can be found at Polyestershoppen. Products ordered today before 5 PM Dutch time, will be sent today.
More information
Would you like more information about installing an epoxy floor in your bathroom? You can reach us by phone at 0031 85 022 00 90. You can also email us at support@polyestershoppen.com. For other questions, please check our information centre.


![Applying Epoxy Floor Coating [GUIDE]](https://polyestershoppen.ams3.cdn.digitaloceanspaces.com/media/cache/document_icon/documenticon/20a8c71cdc2c326d5d305920dadc0d40e3fc1a56.webp)