Good preparation is half the battle. In this article, we provide several tips to help you achieve the best possible result when applying new antifouling or boat paint.
General preparation
Instructions for use and Documentation
Always read the label before you begin and follow the instructions for use carefully. If in doubt, contact us. Also consult the technical documentation and create a clear plan outlining all required steps. Make sure to respect the recommended overcoating times.
The technical documentation can be found on our website and is also sent to you by email with your shipping confirmation.
Pre-treatment
Good pre-treatment is essential. Check the substrate and ensure it is suitable for painting. Thorough degreasing and sanding are crucial. Preparation often takes longer than painting itself, but it is vital for achieving the best result.
Calculating surface area
Calculate the required amount of paint in advance. Always use the recommended brushes, rollers, the correct sandpaper, and personal protective equipment.
-
Underwater hull of motorboats (shallow draught and straight keel):
1 x waterline length x (beam + draught) -
Underwater hull of sailing yachts (deep draught and long keel):
0.75 x waterline length x (beam + draught)
-
Underwater hull of sailing yachts (shallow draught and short keel):
0.50 x waterline length x (beam + draught)
-
Hull above the waterline:
2 x (overall length + beam) x the average height from waterline to deck (freeboard height)
Personal protection
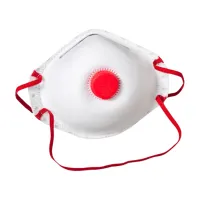
When sanding, always wear a P2 dust mask, gloves and safety goggles.
When applying paint systems, ensure adequate ventilation. If this is not possible, we recommend wearing a vapour mask. Avoid skin contact with paint and always wear safety goggles.
Degreasing
Before sanding, you must clean and degrease the substrate thoroughly. Loose dirt and deposits can be removed with warm water and ammonia. Degrease the surface before sanding to prevent grease or wax from being worked into the sanding scratches. Use only clean (paper) cloths.
Sanding
Proper sanding ensures good adhesion to the substrate and between paint layers. It also results in a smoother finish. Always sand primers dry. Topcoats may be sanded wet or dry. Use the correct sandpaper for each substrate and always remove sanding dust afterwards.
| Sandpaper for bare substrates | Grit | Method |
| Bare polyester | P280 - 320 | dry |
| Bare steel | P60 | dry |
| Bare wood | P180 - 220 | dry |
| Existing paint layers | P220 - 280 | dry |
| Sandpaper for painted substrates | Grit | Method |
| 1K Primer | P220 - 280 | dry |
| 2K Primer/coating | P180 - 220 | dry |
| 1K Topcoat | P180 - 220 | wet |
| 2K Topcoat | Min. P360 | wet |
Working conditions
Humidity
The surface must always be clean and dry. When working in an unheated shed/workspace, the risk of condensation is high, and moisture can affect drying and the final result. Rising moisture can cause the wet paint film to turn dull. Two-component topcoats are particularly sensitive. Work in a well-ventilated, clean, dry and draft-free environment.
Temperature
For a good end result, the paint, the object and the surrounding environment must all be at approximately the same temperature. Large temperature differences affect drying and adhesion. In cold conditions, paint dries more slowly, becomes tougher and is more difficult to apply. When painting overhead, watch out for condensation caused by warm breath hitting a cold surface.
Use a hygrometer and thermometer to verify suitable conditions. A simple test: hold a tissue against the surface. If it sticks, the surface is too damp to paint.
Avoid painting in direct sunlight, strong wind or humid weather. If conditions are poor, wait for a more suitable moment.
| Min. temperature | Max. temperature |
Max. relative humidity |
|
| 1K Primer | 10°C | 25°C | 85% |
| 2K Primer/coating | 15°C | 25°C | 70% |
| 1K Topcoat | 5°C | 30°C | 85% |
| 2K Topcoat | 12°C | 25°C | 70% |
More information about paint?
These guidelines will help ensure your painting project runs smoothly and results in a high-quality finish. If you have any questions about boat paint, primers or antifouling, feel free to contact our specialists by email or phone. We are happy to help you make your project a success!