Step-by-Step Guide: Installing a Bow Thruster in a Fibreglass Boat
Installing a bow thruster in a fibreglass boat may seem like a challenging project, but with a clear step-by-step plan and the right materials, it’s a task that any DIY enthusiast with some experience working with epoxy can handle. In this article, we’ll guide you through each step of the process, so you can get started confidently and save a considerable amount of money.
What are the benefits of a bow thruster?
Fitting a bow thruster to your motorboat or sailing yacht offers numerous advantages that make boating not only easier but also safer. Below we’ve listed the main benefits for you:
- Easy manoeuvring in tricky situations
A bow thruster gives you extra control, allowing you to manoeuvre effortlessly even in challenging conditions such as tight harbours or strong currents.
- Prevent hull damage
A bow thruster helps you avoid annoying scratches or damage that can occur when mooring or casting off. It keeps your boat in top condition.
- No more risky rope tricks
Thanks to the added steering power, there’s no need for dangerous manoeuvres with lines or fenders. This makes every trip smoother and safer.
- More control over your boat
Whether you own a motorboat or a sailing yacht, a bow thruster gives you the precision you need to stay fully in control in any situation.
- Stress-free mooring
With a bow thruster, mooring and unmooring become relaxed and stress-free. No more panic when approaching a busy pontoon or entering a narrow berth!
Step-by-step guide: Installing a bow thruster
What do you need for this project?
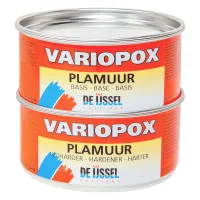
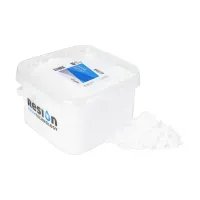
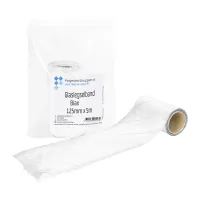
To install a bow thruster, you’ll need the following materials:
All products are easy to order from Polyestershoppen. If you order before 5.30 pm CET, we’ll dispatch your products the very same day, so you can start your project straight away. If you have unused products left afterwards, you can return them within 30 days.
Preparation
Good preparation is essential for a smooth project. Mask off anything that mustn’t get dirty - this is an important step. You’ll be grinding and working with epoxy, which can cause stains. Covering with plastic foil is always quicker and cheaper than cleaning up later, or worse, removing cured epoxy. Also prepare a level work surface covered with plastic, where you can mix epoxy and prepare the glass reinforcement.
Step 1. Determining and marking the position
Decide on the correct position for the bow thruster and mark it carefully on the hull.
Step 2. Cutting the hole in the hull
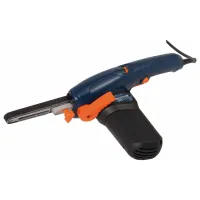
Cut or grind a hole at the marked location. Make sure the bow thruster fits properly in the opening. A small amount of clearance is fine — you’ll later fill it with thickened epoxy. Use an angle grinder or belt sander to make the cut.
Step 3. Chamferring the edge of the hole
Chamfer the outer edge of the hole (about 2–3 mm deep and 30–40 mm wide).
Step 4. Roughening the bow thruster and the hull
For optimal adhesion, both the bow thruster and the inside of the hull must be well roughened. Sand about 10 cm around the bonding area using sandpaper (P36–P60). You can use an angle grinder with a fibre disc. A for this. On the inside of the hull, remove the topcoat until the laminate becomes visible.
Step 5. Bonding the bow thruster
Fix the bow thruster in the correct position in the hull. Use small wooden wedges if necessary to hold the gap between the thruster and hull. Mix a thick adhesive paste (peanut butter consistency) from universal epoxy and Stewathix, and apply it in the joint between the bow thruster and hull so that it slightly protrudes on the outside. Smooth the seam with a rounded mixing spatula.
Pro tip: bond the bow thruster in two stages - first the side that’s easy to reach, then the harder-to-reach area. After this step, the inner corner will be neatly rounded, and the outer joint nicely sealed.
Step 6. Roughening the surface
After curing, roughen the joint again to remove sharp edges or raised epoxy.
Step 7. Laminating the inside
Apply 3 to 5 layers of biaxial glass tape (450 gr/m²) with universal epoxy resin on the inside, working from hull to bow thruster. Overlap each layer slightly less than the previous one (e.g. first 10 cm, second 8 cm, and so on). Roll each layer thoroughly with a venting roller. These layers can be applied in one go.
Pro tip: pre-impregnate the glass reinforcement on a workbench using epoxy with a yoghurt-like consistency and a brush. This helps it stick properly. Consider laminating it on a layer of plastic film, transferring it to the bow thruster with the film still attached, pressing it into place, and then carefully peeling away the film. Roll again with a venting roller to remove air bubbles.
Step 8. Sanding the outside
Lightly sand the outer side of the joint (2–3 mm deep, 20–30 mm wide). This will make external laminating easier. Use a belt sander.
Step 9. Laminating the exterior
Laminate 3 to 5 layers of glass reinforcement on the outside in the same way as the inside, with overlapping layers for extra strength.
Step 10. Coating the inside
Once the laminate has cured, sand it lightly and apply a protective layer of RESION EP Colorshield (epoxy roller coating) in your preferred colour. We recommend using a light colour, as this improves visibility in confined spaces and makes it easier to spot any water or oil leaks.
Step 11. Finishing the outside
Sand the exterior smooth with an angle grinder and fibre disc. Fill any irregularities with epoxy filler, then apply several layers of RESION EP Coloursheild, primer, and antifouling for a durable finish.
More information about this project?
With this step-by-step guide, you can install a bow thruster in your own fibreglass boat. If you have any questions or need personal advice, feel free to contact our specialists via email, phone or WhatsApp - we’ll be happy to help!