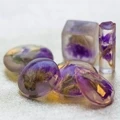
Bring positive energy into your home by making your own orgonite! With Polyestershoppen's products, you can easily make this beautiful decoration yourself. Want to know how? Then read this article! It was written by Frank, an orgonite and epoxy enthusiast.
What is an orgonite?
An orgonite is a stack of inorganic material, such as various metals, minerals or crystals cast in RESION UV Resin Art Epoxy (medium viscosity). As the resin cures, quartz crystals are subjected to mechanical pressure and the well-known piezoelectric effect occurs inside the crystal. It is believed that for this reason orgonite works so effectively as a positive energy transformer.
What do you need to make an orgonite?
- A mould, or make your own with shore 15 silicone casting rubber
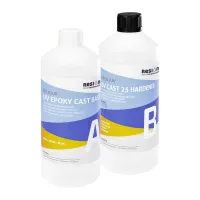
- RESION UV Resin Art Epoxy (LV)
- Mixing spatulas
- Mixing cups
- Kitchen scale
- Nitrile gloves
- Release agent spray
- Acetone
- Vacuum vent kit (optional)
- Objects you want to cast into the orgonite pyramid such as, special stones, copper wire etc.
Step 1. Preparation
Develop your idea into a design in advance, select all amulets, pendants, copper spirals, etc. and have them ready. Determine in which layers you want to cast various objects. First clean all objects thoroughly with acetone to prevent a later reaction with the epoxy.
To make orgonite, you can use various epoxy casting resins. A commonly used casting resin is RESION UV Resin Art Epoxy (LV). MetalTint pigments can be used for coloring or other Resin Art pigments!
Step 2. Make sure you have a good orgonite mould
It is fairly easy to make your own mould from an existing orgonite pyramid by casting it in shore 15 silicone casting rubber. Ready-made casting moulds are also available online to make your own orgonite. Epoxy does not adhere to plastics such as HDPE, but if in doubt, we recommend using a release spray. Note, however, that the smoother the mould, the nicer you get it out of the mould. Should the epoxy orgonite come out dull, it can always be varnished or polished.
Step 3. Mixing and pouring the epoxy
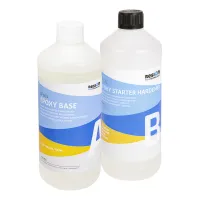
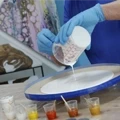
Weigh component A and B of the epoxy in the correct mixing ratio. The mixing ratio is always shown on the package label. Mix both components gently and thoroughly for at least 3 minutes. Always wear nitrile gloves when working with epoxy. Pour the mixture into a new clean mixing cup to ensure that all parts are well mixed.
Briefly mix the contents poured over into the new mixing cup again and, if necessary, use a vent kit to rid the mixture of air bubbles. This step is not necessary but gives a nice final result. Place the desired objects in the mould and gently pour the epoxy into the mould at one fixed point.
Step 4. Curing, demoulding and finishing
At room temperature, most epoxy resins need about 24 hours before they are cured to the point where you can remove the final result from the mould. Removing the orgonite from the mould is, of course, an exciting moment. This is when you will discover how well your orgonite pyramid turned out.
Depending on the mould and the filling in the object, you can choose to sand the object and then lacquer it with, for example, DD Paint or polish it with RESION High Gloss Polish for epoxy. The possibilities are endless when it comes to making an orgonite. Think pendants, domes, figurines, etc. Let your imagination run wild!
This article was written by Frank, an orgonite and epoxy enthusiast. Want to know more about Frank or his creations? Then check out his Facebook page here.