We regularly receive questions about how to properly protect wood. In this article, you’ll learn how to optimally protect wood using a combination of epoxy and Double Coat DD Paint. This high-quality finish provides excellent protection against weather conditions and ensures a long-lasting gloss. In this article, you’ll also find a clear step-by-step guide to perfectly finish your wood project.
What is DD Paint?
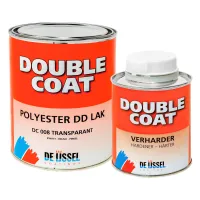
Double Coat DD Paint is a high-quality two-component polyurethane coating, suitable for various materials such as wood, epoxy, metal, and plastic. DD Paint is known for its high scratch resistance, UV resistance, and excellent gloss retention. It is available in high gloss (most popular), silk gloss, and matte, and can be supplied as a transparent coating or in any desired RAL colour.
Benefits of Double Coat DD Paint:
- Very good UV resistance.
- High scratch resistance.
- Long-lasting colour and gloss retention.
- Available as a transparent coating or in any desired RAL colour.
Treating wood with DD Paint [guide]
Follow the steps below to protect wood using DD Paint.
Materials needed:
You will need the following products for this job:
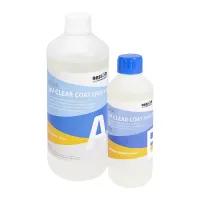
- Transparent epoxy coating
- Double Coat DD Paint
- Sandpaper (P120, P150, P180, P240, P320, P400)
- Epoxy roller, foam rollers, brushes and paint trays
- IJmopox Thinner
- Nitrile gloves and a 3M vapour mask
- Mixing cups and mixing spatulas
- Digital scale
Step 1. Sand the wood
Start by sanding the wood with P120 grit. Remove dirt, saw marks, and rough spots until the surface is smooth.
Step 2. Apply the first coat of epoxy
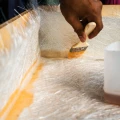
Mix the epoxy (for example, RESION UV Clear Coat) according to the instructions. Apply an even coat using an epoxy roller and allow it to cure for 24 hours.
Step 3. Sanding
After curing, the surface will feel rough because the wood fibers have risen. Lightly sand the surface with P150 or P180 grit until about 70% of the surface is matte.
Step 4. Apply two coats of epoxy
Apply two coats of epoxy with a short interval, so you don’t need to sand between coats. The second coat can be applied while the first is still slightly tacky (not fully cured). This depends on temperature. Generally, you can apply the first coat in the morning and the second in the afternoon.
Step 5. Sanding
Sand the surface again with P150 or P180 grit until 80–90% of the surface is matte.
Step 6. Apply the last coat of epoxy
Apply one final coat of epoxy in the same way as the previous coats.
Step 7. Fine sanding
Use P240 grit sandpaper to make the entire surface matte. Optionally, you can start with P180 before moving to P240.
Stap 8. Apply the first coat of DD Paint
Mix the base component and hardener of DD Paint in the correct ratio (67:33). Allow the mixture to pre-react for 30 minutes, then add 3–5% IJmopox Thinner. Apply the paint evenly with a foam roller or brush. Roll or brush the surface afterward without applying much pressure. Allow the paint to cure for approximately 24 hours at 20°C.
Step 9. Apply the second coat of DD Paint
After 24 hours (at 20°C), you can apply the second coat without sanding. If you wait longer, sand with P320 grit before applying the second coat. Allow the final coat to cure for at least 5 days. For an even smoother result, you can optionally sand lightly with P400 and apply an additional coat.
Step 10 (optioneel). Polishing
After one week of curing, you can optionally polish the DD Paint for a glossier finish. For example, use RESION High Gloss Polish.
More information about this project?
If you have any questions after reading this article about treating wood with DD Paint or if you’d like advice on choosing the right products for your project, feel free to contact our specialists via email, phone or WhatsApp. We’re happy to help!