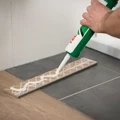
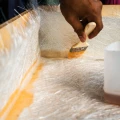
Plastic shower trays sometimes get damaged due to wear and tear, renovations, or age. In this article, we cover the most common types of damage and show you how to easily repair them yourself using epoxy or polyester.
Repairing a scratch or chip in an acrylic shower tray or plastic bathtub
Acrylic shower trays are mostly found in residential homes. They are plastic trays or tubs reinforced on the back with polyester and fiberglass. These shower trays and tubs are relatively durable, but they are susceptible to scratches and damage—especially when heavy objects fall into them.
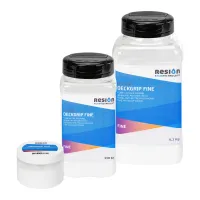
Damage like scratches and chips can easily be repaired with a sanitary repair kit. With this repair kit, you can fix the damage to your acrylic bathtub or shower tray in just 15 minutes. Follow these steps:
- Clean the damaged area.
- Mix component A and B together and let it rest for 5 minutes with the cap on.
- Extract the mixture from the bottle using the syringe and fill the damage.
- Apply generously, as it can shrink up to 20% during curing.
- Once cured, sand the repair using sandpaper and water.
- To give the repair a glossy finish, use the included polishing paste and rub it in with a cloth.
Repairing a cracked shower tray
Unreinforced plastic shower trays are commonly used in campers, caravans, boats, and mobile homes. Over time, these trays can crack, leading to leaks. Leaks often occur around the drain or in the corners. Replacing the tray is rarely an easy task, as it sometimes requires removing walls.
However, it is often possible to repair the shower tray using epoxy or polyester.
Should I use epoxy or polyester?
Both materials provide a waterproof result. However, epoxy and polyester cannot be used together or interchanged. A choice must be made. Below are the advantages of epoxy and the advantages of polyester.
| Epoxy | Polyester |
|
|
Working with polyester
Polyester emits a strong, pungent odor during application. If you are living in the caravan, boat, or camper while carrying out the repair, we advise using epoxy, as it is odorless and can easily be used indoors.
Requirements (per square meter):
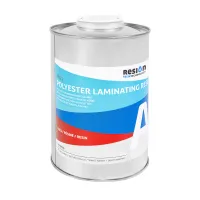
- RESION Polyester Bonding Primer: 250 g/m2
- Fiberglass mat: 1 m2 450 g/m2 up to 3 m2 450 g/m2
- 1 kg polyester resin (when using 1 m² 450 g/m2 fiberglass mat) up to 3 kg polyester resin (when using 3 m² 450 g/m2 fiberglass mat)
- Sandpaper roll
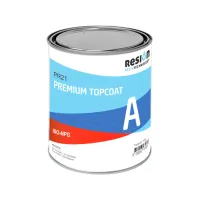
- Coloured polyester topcoat (300 g/m2)
Step 1. Stabilizing the substrate
If the shower tray flexes because a support underneath is broken or rotted, this must be addressed first. Clean the shower tray thoroughly using water and ammonia, for example. Remove the shower drain and clean this area as well. Sand the shower tray using 120-grit sandpaper.
First, apply a layer of polyester bonding primer. After waiting at least 30 minutes (and no longer than 12 hours), you can apply a layer of polyester resin and fiberglass mat. For small, well-supported trays, a single layer of 450 g/m2 fiberglass mat is sufficient. For larger and less supported trays, up to 3 layers of 450 g/m2 fiberglass mat can be used.
Finally, finish with a 225 g/m2 fiberglass mat. This provides a smoother surface texture.
Step 2. Finishing with polyester topcoat
Finishing with a topcoat is quick and efficient. It creates a slightly textured surface that is easy to keep clean. Polyester topcoat is available in almost all RAL colors. You can optionally add non-slip additive to the topcoat to make the floor less slippery.
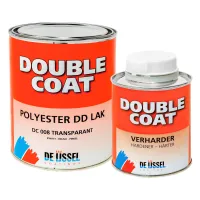
In addition to a topcoat finish, you can also give the shower tray a completely smooth finish using DD paint. Since polyester has more texture than epoxy, more filler will be required to get it smooth. DD paint is the top choice for coatings. This paint is available in high gloss and semi-gloss, as well as in almost all RAL colors. Non-slip powder is also available for this paint.
Working with epoxy
Epoxy is virtually odorless, making it suitable for use even while living inside the caravan, camper, or boat. Additionally, it offers superior adhesion to materials like metal, wood, etc.
Requirements (per square meter):
- 3 m2 woven fiberglass fabric 300 g/m2
- 1 kg universal epoxy resin
- Epoxy filler
- DD paint in RAL color
- Sandpaper roll (120 grit)
Step 1: Stabilizing the substrate
If the shower tray flexes because a support underneath is broken or rotted, this must be addressed first. Clean the shower tray thoroughly using water and ammonia, for example. Remove the shower drain and clean this area as well. Sand the shower tray using 120-grit sandpaper.
Next, apply three layers of epoxy and 300 g/m2 woven fiberglass fabric. You can extend this approximately 10 cm up the walls if needed. If the floor area is large and poorly supported, you will need to apply additional layers.
Step 2: Finishing epoxy
The 300 g/m2 woven fiberglass fabric leaves a fine texture behind. If this texture is not desired, roll a coat of epoxy over the fabric to fill in the weave. Once cured, sand the surface and touch up with epoxy filler where necessary. Finally, finish the tray with DD paint. This paint is available in high gloss and semi-gloss, as well as in all RAL colors.
Need more information?
At Polyestershoppen, you will find all the supplies needed for a complete polyester or epoxy repair. Would you like more information about this project? Feel free to contact our specialists; we are happy to advise you!