Over time, (hairline) cracks may appear in the polyester roof of your camper causing roof leaks. Repainting often does not give the desired result, especially not in the long term. To carry out a durable repair, you must re-provide the roof with a new layer of fibreglass and finish it with, for example, DD Paint or polyester topcoat.
For convenience, in this article we assume a camper roof with a total surface area of 10 square meters. You can then calculate what you need to repair the roof of your camper based on the suggested supplies.
Epoxy or Polyester?
There are 2 resin systems for repairing a leaking polyester camper roof: Epoxy or Polyester. In the diagrams below you will find the advantages and disadvantages of the two resin systems.
Epoxy resin
| Advantages | Disadvantages |
| Odourless | More work |
| Good adhesion to various surfaces | More expensive than polyester |
| Provides a light and smooth result | Must be finished with PU lacquer |
| Good adhesion to aluminum |
Polyester resin
| Advantages | Disadvantages |
| Easy processing | Strong odour during processing |
| Cheaper than epoxy | Less smooth finish |
Epoxy repairs
Supplies (based on 10m2)
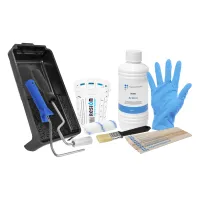
- 6 kg universal epoxy resin
- 10m2 glass fabric 300 gr/m2
- Epoxy filler (optional)
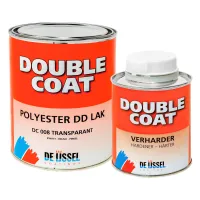
- 2 kg DD Paint (with the gloss and colour of your choice)
- Mixing cups
- Mixing spatulas
- Nitrile gloves
- Venting roller
- Velour roller + paint roller frame
Step 1. Repair the cracks
Sand down the rough edges on the cracks at an angle. This can be done with, for example, coarse sandpaper, a sander or manually with an angle grinder and a fibre disc. Then fill the trench with glass fibre and epoxy resin. You do this as follows:
- Prepare the universal epoxy by carefully weighing components A and B according to the mixing ratio on the packaging and mixing both components thoroughly.
- Apply glass fabric (300 gr/m2) cut to size and wet it with epoxy.
- Roll out the air bubbles with a venting roller. It is important that there are no white spots left and that the structure of the tissue is clearly visible.
- Apply more layers until the trench is completely filled (a layer of 300 grams glass fabric gives approximately 0.3 mm layer thickness).
- Allow the epoxy resin to cure completely.
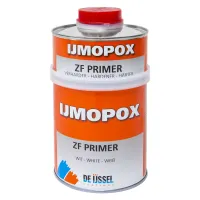
Do you have an aluminum roof? First clean this thoroughly and remove any loose parts. If a lot of paint is loose, remove all paint. Then apply a primer (for example De IJssel ZF Primer) and let it harden.
Step 2. Laminate the roof
After you have addressed the cracks, you can start treating the rest of the roof. You will need to sand the entire roof for this. You can sand a polyester roof with a coarse grit (for example 40 or 60). During sanding, loose gelcoat may come off, but this is not a problem. If this happens in many places, you may consider sanding away the gelcoat completely. Also sand the repaired parts completely flush with the roof.
If you have an aluminum roof that you primed in the ZF primer in the previous step, sand it lightly with fine sandpaper (280 grit).
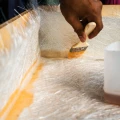
You can now apply a layer of glass fabric 300 gr/m2. Use the same method as for the repair in step 1. Large flat parts can also easily be provided with epoxy by pouring it over the fibre and spreading it with a laminating spatula or a wallpaper spatula.
Step 3. Finish the camper roof
After the epoxy has hardened, you can apply another layer of epoxy with a roller to fill the structure of the fibre. Then, after curing, you can degrease the roof (with water and ammonia, for example) and the roof can be sanded until it is flat again. Any minor imperfections can still be corrected with epoxy filler.
You can use DD Paint to protect the roof. This high-quality polyurethane lacquer is available in every RAL colour in high gloss, matt gloss and semi-gloss. We have written an extensive article about finishing with DD Paint. You can also follow the instructions stated in the DD Paint technical documentation.
Polyester repairs
Supplies (based on 10m2)
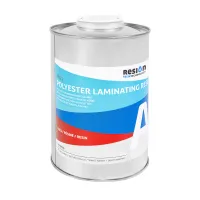
- 9 kg polyester laminating resin
- 10m2 fibreglass chopped strand mat 300 gr/m2 or 450gr/m2
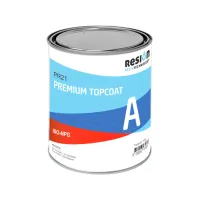
- 6 kg polyester topcoat
- Disposable brushes
- Mixing cups
- Mixing spatulas
- Latex or nitrile gloves
- Venting roller
- Velour roller + paint roller frame
Step 1. Repair the cracks
Sand out the cracks at an angle, for example with coarse sandpaper, with a sander or by hand with an angle grinder and a flap disc. Then fill the crack with fibreglass chopped strand mat (300 gr/m2) and polyester resin. Please do this as follows:
- Mix the polyester resin with 2% hardener and fill in the crack with a brush.
- Place a torn or cut piece of glass mat.
- Apply more polyester resin with a brush or roller until the glass mat is completely saturated and no white spots are visible anymore, but the structure of the fibre is still visible.
- After applying the glass fabric, you can use a venting roller to remove air bubbles. Roll the roller over the glass fabric under light pressure and push away the air bubbles to the sides.
- Use as many layers of glass fabrics as necessary to completely fill the crack. A layer of fibreglass chopped strand mat 300 gr/m2 gives approximately 0.6-0.7 mm thickness.
- Now let the polyester resin harden completely.
Step 2. Laminate the roof
After you have addressed the cracks, you can start treating the rest of the roof. You will need to sand the entire roof for this. You can sand a polyester roof with a coarse grit (for example 40 or 60). Loose gelcoat may come off during sanding, but this is not a problem. If this happens in many places, you may consider sanding away the gelcoat completely. Also sand the repairs completely flush with the roof.
A layer of fibreglass mat can now be applied. This can be a 300 gr/m2 mat or a 450 gr/m2 mat if a stronger result is desired. Proceed in the same way as in step 1. Wet a piece of roof again with resin and a roller, place the fibreglass mat on top, saturate it with a roller and roll with the deaeration roller. It is preferable to tear the required pieces of fibreglass mat because this results in invisible transitions at overlaps.
Step 3. Finish the camper roof
After the polyester resin has hardened, it can be lightly sanded to remove any raised fibres. Also sand the edges neatly. Then tape the edges to apply a polyester topcoat.
- Mix the top coat with 2% hardener.
- Roll out the topcoat evenly over the entire roof (ensure sufficient layer thickness, use approximately 600 grams per m2).
More information about repairing a camper roof?
In the article above you could read how you can repair damage to the polyester roof of your camper. Do you still have questions or need advice after reading this article? Please feel free to contact our customer service team. They are happy to help you by telephone, email or live chat!