How to Laminate a Surfboard with Carbon Fibre and Epoxy
In order to achieve a perfect laminate and ideal fibre to resin ratio, the industry often uses the vacuum wet bagging method. This method involves applying a vacuum to remove excess epoxy from the laminated fabric, resulting in an ideal resin-to-resin ratio.
In this article we explain step-by-step how to make a surfboard from expanded polystyrene (EPS) and laminate it with carbon fabric using the vacuum wet bagging technique. The step-by-step plan includes the following five steps:
Stap 1. Preparation
Step 2. Carbon lamination
Step 3. Vacuum pulling
Step 4. Removing the vacuum bag
Step 5. Applying second layer of carbon fabric
Wet bagging is widely used for reinforcements in motorcycle fairings, model and competition boats, boats, surfboards, spoilers, centreboards, rudders and car parts.
In the video above, Herman and Alexander explain step-by-step how to cover the surfboard made of EPS with carbon fabric.
Step 1. Preparation
Think of a way for yourself to work conveniently. Expect epoxy to drip off as you work, so cover the floor.
Make sure that the surface you are going to cover is rough and clean. If necessary, sand the surface briefly. Is the surface very light? Then there is a chance that you will see this through the carbon fabric. If this is the case, you can first spray the surface black with acrylic paint.
Step 2. Carbon lamination
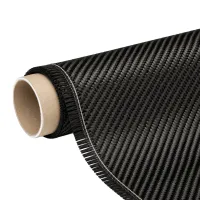
Cut the carbon fabric generously to the size of the surface. Do this carefully because carbon twill fabric in particular frays and twists quickly. Lay the fabric neatly on the surface.
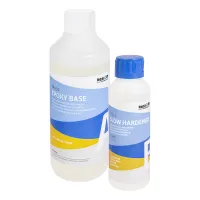
We will now laminate the carbon fabric. In the video we use a universal epoxy resin with slow hardener so that we have enough time to go through all the steps. After pouring the epoxy, the assembly must be packaged so that the vacuum can be drawn.
The epoxy should be at room temperature and dosed at 150 grams per square metre using the correct mixing ratio (2 parts by weight of base and 1 part by weight of hardener). Mix both components thoroughly and do not forget to include the edges and bottom of the mixing bowl.
The epoxy is then poured onto the carbon cloth and spread with the lamination spatula. The epoxy is then applied to the carbon fibre and spread using the lamination spatula. Do not press too hard because you will damage the fabric and the epoxy may start to foam.
In this way, multiple layers of fabric can be laminated one after the other.
Step 3. Vacuum pulling
After laminating the carbon fibre, it is important to place the surface under vacuum.
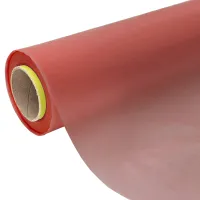
Cut perforated foil and bleeder to size and cover the surface with it. In the video we sprayed the bleeder and perforated foil with spray adhesive and bonded them together. This is easier to work than with loose perforated foil.
TIP: you can also choose to apply peel ply (tear-off fabric) before covering the surface with perforated film and bleeder. Peelply gives a rough surface, which is desirable if you want to glue or laminate on it.
Then cut the vacuum foil generously so you can use it to wrap the entire workpiece. It is important to cut generously, to be able to make pleats.Then cut the vacuum sheet generously so you can use it to wrap the entire room. It is important to cut wide, to be able to make pleats.
Wrap the entire work piece with the vacuum foil and seal the bag with sealing tape. Press firmly so there are as few air leaks as possible. Glue a piece of bleeder around the end of the vacuum hose so that it does not close under the vacuum bag. Run the vacuum hose through the end and tape it shut.
Turn on the pump and check if the bag is under vacuum. If not, listen carefully along the edges, as you can usually hear air leaking. If there is a leak, press the sealing strip firmly or apply an extra piece to seal it properly.
The PS90 pump has adjustable vacuum. A vacuum of 0.5 bar under pressure is sufficient for this application. Leave the pump running for at least 12 hours. One of the great advantages of the PS90 pump is that it has a buffer, which means that the pump itself is not constantly on and is not subject to unnecessary loads.
Now that the surface has been laminated and is vacuum sealed, it must be allowed to cure for at least 24 hours.
Step 4. Removing the vacuum bag
After the surface has completely hardened, the vacuum bag can be removed. Carefully cut the vacuum bag, perforated foil and bleeder. The combination of bleeder and perforated film is easily removed from the laminate.
Step 5. Applying second layer of carbon fabric
After applying the first layer of carbon, you can apply the laminate to the other side of the surfboard. Mark where the next layer of carbon should come, secure it with tape and repeat steps 1-4 described above. After curing, the carbon fabric can be cut along the tape, so that a very tight transition is obtained.
More information about wet bagging?
In the aforementioned step-by-step plan, you were able to read how you can coat a carbon fibre substrate using the vacuum wet bagging technique. We wish you much success in your project! If you still have questions after reading this article, please do not hesitate to contact our customer service. We are happy to help you!
What is polyester resin and what can you use it for? In this article we explain the basics of working with polyester resin. At Polyestershoppen you will find al…
More information
At Polyestershoppen, you will find all the information you need about epoxy for beginners. Would you like to work with epoxy resin but don't you know where to s…
More information
Making a polyester pond has many advantages and is relatively easy to do yourself. If you make your own pond, you will save a lot of money! With the help of a…
More information
Polyester is a material that is easy to repair with materials that are easy to process. An average do-it-yourselfer can easily carry out polyester repairs. On t…
More information
Covering an object with polyester has a number of important advantages: the object is strengthened, becomes water-resistant and is easy to colorize. Coating wit…
More information
Do you want to cast an object in epoxy? Then you are in the right place. In this article we explain how you can properly protect an object against external infl…
More information
If you process polyester and epoxy resins on a regular basis, it is customary to clean all tools such as vent rollers, Japan spatulas e…
More information
To create a strong yet lightweight construction, a polyester resin or epoxy resin is combined with a reinforcing fibre. These reinforcing fibres are availa…
More information
Over time, (hairline) cracks may appear in the polyester roof of your camper causing roof leaks. Repainting often does not give the desired result, especia…
More information
Making a carbon overlay with real carbon fabric (carbon) is not difficult. In this article we explain step by step how to achieve optimal results!
Suppli…
More information
You can give a metal or pastic surface a fine finish with Double Coat DD Paint. In this article we explain step by step how to do this. DD Paint is a 2-componen…
More information
In order to achieve an almost invisible gelcoat, the new gelcoat to be applied must have the exact colour of the surrounding gelcoat. It is often not possible t…
More information
If you want to make multiple polyester products, you can use a mould. You can then work faster and more efficiently. It is important that the mould is of good q…
More information
Wood rot is a form of wood decay that occurs when wood is exposed to moisture for a long time. This moisture allows fungi to grow in the wood, which breaks do…
More information
Epoxy finishing concrete countertops, sinks, water ornaments and garden statues is a good way to get a smooth surface that is waterproof and easy to keep c…
More information
Hot tubs are becoming increasingly popular. They offer the opportunity to relax in your own garden. Most hot tubs are made of wood. Wood insulates well and also…
More information
EPS (Expanded Polystyrene Foam) and XPS (Extruded Polystyrene Foam), often referred to as Styrofoam, Roofmate or insulation board, are inexpensive materials tha…
More information
Bakelite is a hard, slightly brittle plastic. It has been widely used for steering wheels of cars and tractors, for radios, household appliances, switchgear and…
More information
Plastic shower trays sometimes become damaged through use, renovations or age. In this article we discuss the most common damages and show you how you can easil…
More information
After mixing silicone rubber, epoxy casting resin or polyester casting resin, a lot of air can enter the material. These air bubbles can lower the quality…
More information
How do you make your own beautiful shield that you often see on TV or at cosplay conferences? You can make one out of metal but that is very heavy and not easy…
More information
As an aquarium or terrarium fan, you will probably want to make your own back wall. The advantages are that a homemade back wall always fits exactly and looks e…
More information
Many Polyestershoppen customers have now renewed their bathrooms using epoxy. You can do various jobs in your bathroom with, for example, our epoxy floor coati…
More information
Do you want to convert a van into a camper van or use it as a refrigerated vehicle? Then you need to insulate the van well to limit the costs of keep the van a…
More information
High energy bills? Time to do something about it! Of course, there are many steps you can take to make your home more energy-friendly. In many old houses or ol…
More information
In order to achieve a perfect laminate and ideal fibre to resin ratio, the industry often uses the vacuum wet bagging method. This method involves applying a va…
More information
Are you looking for the right products to bond different materials? We have a wide range of professional adhesives for bonding metal, iron, aluminum, wood, plas…
More information
In this article you can read everything about PU foam from Froth-Pak. We explain to you what the benefits of Froth-Pak are and what you need to process it. We h…
More information
Stabicure is a revolutionary method in the field of wood stabilisation. It is a process in which wood is impregnated with a special resin, also known as "c…
More information
Epoxy putty (filler) is a versatile and durable material that is often used to fill cracks, holes and other irregularities in various surfaces. Did you know tha…
More information
Insulating a container is an essential step for maintaining temperature and protecting it from external influences. In this article, you can read how to easily…
More information
Polyethylene (PE) and Polypropylene (PP) are notoriously difficult materials to bond. Common adhesives do not work, epoxy does not adhere to them and welding is…
More information
We regularly receive questions about how to properly protect wood. In this article, you’ll learn how to optimally protect wood using a combination of epox…
More information
Although polyester and epoxy resins are naturally low-viscosity, it can sometimes be useful to thicken them with fillers for various applications. This is easil…
More information
Do you have a question about this article?
Do you have a specific question? Call one of our specialists for free advice
+3185 0220090