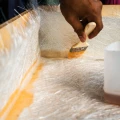
Polyester is a material that is easy to repair with materials that are easy to process. An average do-it-yourselfer can easily carry out polyester repairs. On this page you will find a detailed description of how to carry out polyester repairs.
What is repaired with polyester?
In everyday life, one comes across polyester products with great regularity. Think of boats, caravans, campers, car bumpers, side skirts, shower trays, horse trailers, canoes, etc. Unfortunately, these products sometimes come into contact with something hard. A crack, crack or hole is sometimes the result. With polyester you can:
- Reinforce an existing polyester product.
- Repair cracks.
- Repair deep/large scratches.
- Repair holes from drilling or damage.
- Repair broken parts.
Most polyester products are finished in color with a polyester gelcoat. A polyester product generally consists of a visible layer that gives the color. This is called the polyester gelcoat. Behind that gelcoat is a thicker layer of laminate. This polyester laminate gives the polyester product its strength. The laminate consists of a glass fiber, colored white/transparent, and a resin, colored light brown. With a polyester repair, all damaged fibers are removed and the laminate is completely rebuilt by laminating with polyester resin and fiberglass mat. The repair is then completed. If you do this neatly, the repair will be just as strong as the original and the repair will be virtually invisible.
What do you need:
- Fiber disc met backing pad
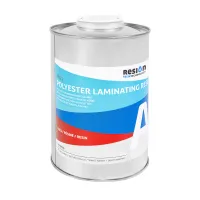
- Polyester laminating resin
- Glass mat
- Nitril gloves
- Dust mask
- Brushes, if necessary a roller
- Mixing cups and mixing spatulas
- Venting roller
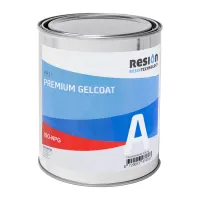
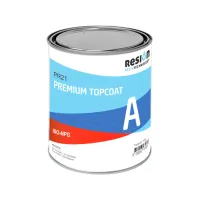
- Polyester topcoat and/or polyester gelcoat
- Sandpaper and polishing paste for finishing
- Acetone for cleaning
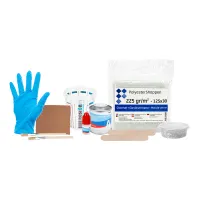
For minor repairs we offer a Polyester repair kit with all the materials needed to carry out a repair.
What types of damage can you repair this way?
Polyester products can be defective in many ways. We distinguish 4 types of damage: gelcoat damage, crackling in the laminate, cracks in the laminate and holes or missing parts.
- Gelcoat damage can be repaired by following the instructions on the next page: Repairing gelcoat.
- Crackle in the laminate.
- Cracks in the laminate can be repaired by grinding away the damage at an angle and then filling it again with polyester resin and glass mat.
- Holes and missing parts are made by beveling the edges and creating a temporary mould from wood, cardboard or other materials. You then apply a new laminate
Step-by-step plan for polyester repair
Step 1. Preparing the polyester repair
Work can only be done on clean and undamaged polyester. Remove all broken and pulverized polyester. In the case of major damage, this can be done by sawing or, in the case of minor damage, by grinding with a fiber disc in the grinding wheel. This releases a lot of dust, so protect yourself against this with a sdust mask. Fix loose parts and position loose parts. This can be done by screwing it on, if necessary with some rudders, a wooden beam or other temporary support. Make sure that the screws are not in the part that will need to be sharpened later or carry out the repair in several parts. Place a piece of tape over the screws so that they do not become contaminated and you can easily remove them. Cover the temporary support with packaging tape so that it can be easily removed.
Step 2. Beveling edges
Bevel the edges of the damaged part well. If you also reach the rear of the repair, you do not have to grind away the entire thickness. In that case, half the thickness is sufficient. This limits the amount of grinding work and also the final size of the repair.
Also grind away any gelcoat (the color layer) on parts where you will apply new glass mat.
This way you have a good and large enough surface to allow the repair to adhere.
Step 3. Making a shim
You should now have a cleanly ground workpiece, but there may still be parts missing or gaps that need to be bridged. Because laminating actually only works well when something is being worked on, the larger missing pieces must be temporarily provided with a shim. It depends very much on the workpiece how it can best be made. In many cases, a piece of wood or cardboard or even a folded or wadded newspaper is sufficient. If the filler piece needs to be removable again, wrap it in kitchen foil or packing tape.
For larger parts, a piece of Styrofoam can be used. This can be planed into the correct shape. In this way, missing pieces with a lot of shape can also be easily recreated. Wrap the Styrofoam in a few layers of kitchen foil or a layer of packing tape, otherwise it will be affected by the polyester.
Step 4. Laminating fiberglass mat with polyester resin
Cut or tear enough glass mat to fill the repair. Often multiple layers need to be applied. Make each layer of glass mat slightly smaller than the previous layer. This way you neatly fill the damage.
Now it's time to do the actual repair. Mix an amount of polyester resin with sufficient polyester hardener (2%). For 0.25 kg of polyester resin you need approximately 5 ml of hardener. For 1 kg of polyester resin you need 20 ml of hardener.
Apply the polyester to the broken surfaces and place a piece of fiberglass mat in it. Apply more polyester until the glass mat is saturated. Roll the laminate with a de-aeration roller after each layer. Then apply a second layer and saturate it as well. You will notice that you need a little less resin for this because the glass mat also absorbs excess resin from the previous layer. Be more careful when applying resin towards the end of the repair. This way you don't apply too much resin. The structure of the glass mat may remain visible.
Step 5. Repeat on the back if necessary
If you can get to the rear, remove the temporary reinforcements now. Grind the back cleanly or diagonally and apply a glass mat with polyester resin. The working method is the same as the front.
Step 6. Finish the polyester repair with topcoat or lacquer
The repair is now just as strong as the original. All that remains is to finish the repair so that it is no longer visible.
Once the back of the repair is visible, you can grind it flat. This can again be done with the grinding wheel and a fiber disc. Move it quickly over the surface, do not let the fiber disc catch the laminate. Then apply a color-matched top coat. Mix the polyester topcoat with sufficient hardener (2%) and apply it with a fleece roller.
You can finish the front in the same way, but it is also possible to choose to finish the finish more extensively. This makes the repair completely invisible. To do this, grind out the repair to just below the surface. Check this with a slat. Make sure you stay approximately 0.5-1 mm below the surface. Now make gelcoat in colour and apply it to the repair. Repeat this after curing if necessary to get above the surface. Gelcoat cures with an adhesive effect. Remove the sticky layer by wiping it away with a cloth and acetone. Sand the repair area flat with waterproof 240-grit sandpaper. If the repair is almost completely flat, switch to 400-grit sandpaper until the repair is completely flat. You then finish the entire sanding ladder (grit 600, 800, 1200, 1500, 2000) until you have a somewhat shiny surface. Polish this to a high gloss. The repair has now become invisible. This process is covered in more detail on this information page: Repairing gelcoat.
Another option is to paint the repair. Bumpers, side skirts and other car parts are often sprayed in the car paint. Boats are mainly rolled in Double Coat DD Lacquer.
Sand the repair to just below the surface and apply an epoxy filler. Sand it flat with the surface with 120 grit. Then sand the surface you want to paint with grit 180, 240 and 320. You can now apply spray filler or primer (in the case of car paint) or apply Double Coat DD Lacquer. We have an information page about painting with DD Lacquer: Finishing metal and plastic surfaces with Double Coat DD Lacquer.
Tips for a polyester repair:
- Glass mat can be cut and torn. Tearing creates invisible seams.
- Do not use too much hardener for your polyester repair, an average of 2% is recommended. The more resin you make, the less processing time you have due to the temperature development
- during the chemical reaction.
- De-aerate each layer by using a tamping motion with a brush or by using a de-aeration roller.
- If the resin is not yet completely hard, you do not need to sand before applying the next coat. Test this by making an impression in the polyester with your nail.
- Minor damage can also be repaired by mixing an amount of cut glass fibers with a small amount of prepared polyester resin. The resulting paste can be used as a repair paste in small holes or damage.
More information about polyester repair?
Do you have questions about the repair of polyester or can we help you with something else? Please feel free to contact our customer service team. We are happy to help you with your project!